Generate token
The Generate Token example project, found here, contains a server that uses the Inworld API Key, API Secret and an Inworld Scene ID to generate an authorization token to access Inworld.
It's important to note that this service is easily run on localhost or on a non-ssl based production server. This service can be easily deployed by using the template of this project on Railway.app. More information can be found in the Railway.app Service Setup section.
If you require to host the project on your own dedicated platform and need SSL or HTTPS you will need to follow the SSL/HTTPS Server Setup documentation.
Table of Contents
Requirements
- Node version 16+
- NPM version 8.19.4+
- Yarn version 1.22.19+
- An Inworld Integration API Key and Secret
- An Inworld Scene ID
- (Optional) A Railway.app account for quickly deploying the service.
- (Optional) SSL Key for remotly hosted servers Why do I need this?
Instructions
If you are setting this project up locally or on a remote server follow these instructions. If you're using an automatic hosting service like, Railway.app, you will not need to perform this but review the list of Environment Variables to know how to setup the service. If you use automated hosting services which don't allow for a .env file to be created to store your Environment Variables you will need to use the NOENV environment variable defined in the Environment Variables section.
- From the project directory type
yarn installto download and install the project dependencies. - Copy the
.env-samplefile to.evn. - Open the
.envfile in an editor and enter your Inworld API Key, Secret and Scene ID after theINWORLD_KEY,INWORLD_SECRETandINWORLD_SCENEfields respectively. - If you wish to configure the port, set SSL keys follow the list of available environment variables here
- Save and close the file.
- If you are using this server in SSL/HTTPS mode follow the instructions here then follow the next step.
- Launch the application by typing in
yarn start.
Environment Variables
The following are the list of Environment Variables this project supports:
| Name | Type | Description | Requirement |
|---|---|---|---|
| INWORLD_KEY | String | The Inworld Workspace Integration API Key. | Required |
| INWORLD_SECRET | String | The Inworld Workspace Integration API Secret. | Required |
| INWORLD_SCENE | String | The Inworld Scene ID. | Required |
| PORT | Number | The port to run the server on. | Optional, defaults to 4000 |
| USE_SSL | Boolean | Set to true if SSL keys are needed. | Optional |
| SSL_KEY_NAME | String | The name of the SSL key file located in the keys folder. | Required only if USE_SSL is true |
| SSL_CERT_NAME | String | The name of the SSL certificate file located in the keys folder. | Required only if USE_SSL is true |
| NOENV | Any | Use if this service is deployed without an .env file such as Heroku. | Optional |
Railway.app Service Setup
The following is are the instructions for setting up the Inworld Generate Token project easily using the service Railway.app. The service requires a GitHub account and will clone this repo into the account.
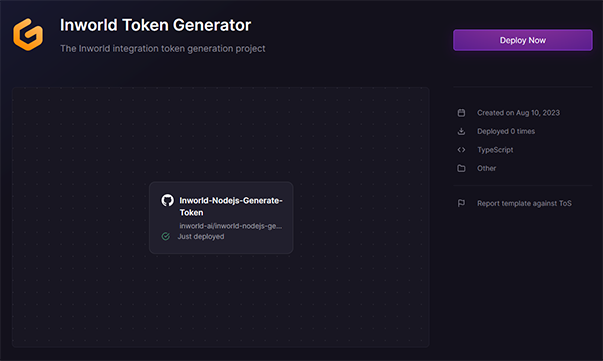
- Goto the Inworld Token Generator template page on Railway.app and click on the Deploy Now button.
- Fill out the
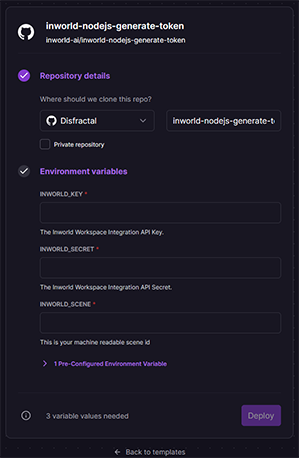
INWORLD_KEY,INWORLD_SECRETandINWORLD_SCENEfields respectively and click on the Deploy button. Information on these can be found in the Environment Variables section.
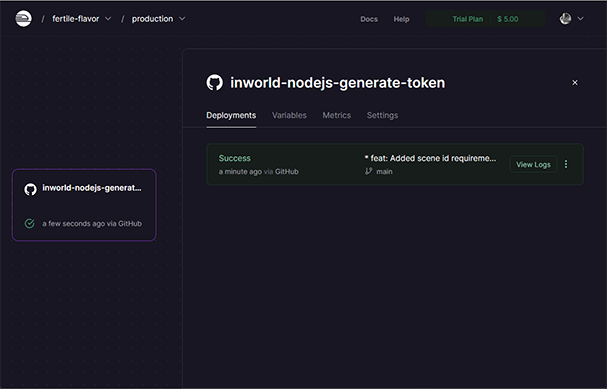
- The service will now deploy and wait until it says Success to know when it's live. If you run into any issues click on the View Logs button and see if errors appear in them.
- Click on the Settings tab and scroll down to Domains. Click on the Generate Domain button
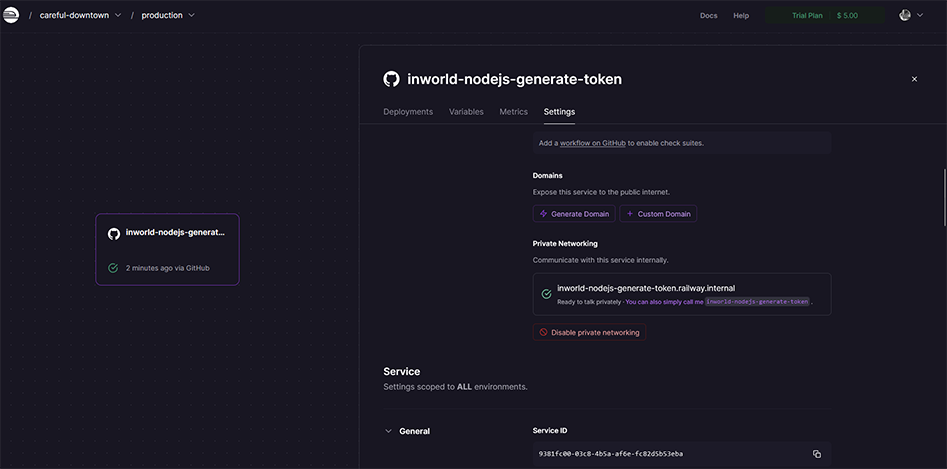
- A public facing domain will now be created for the service.
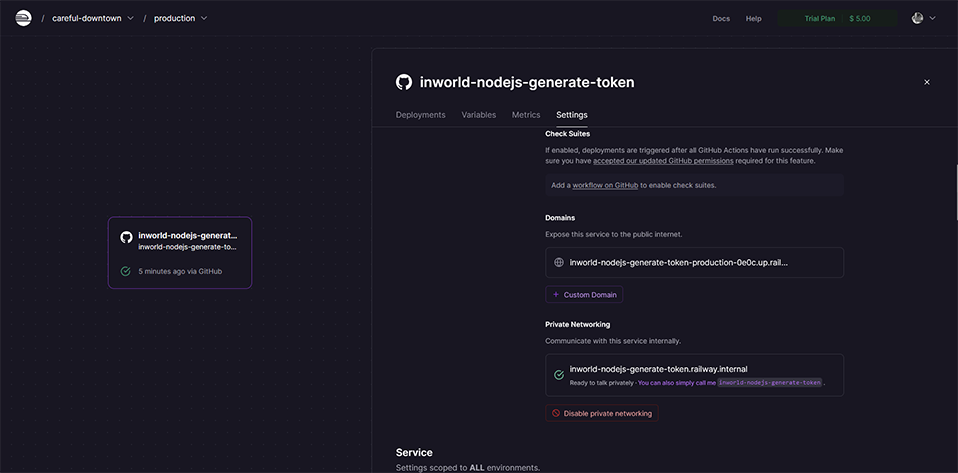
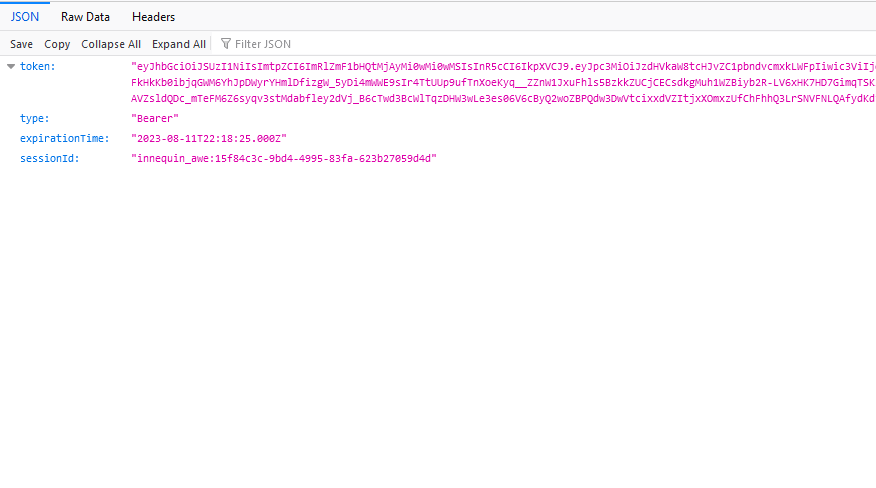
- Test the domain by opening it in your web browser. You should see a successful JSON token response.
Dedicated SSL/HTTPS Server Setup
Due to modern security requirements for browsers, if you run the Inworld Web SDK from an external or Production service that uses SSL/HTTPS, you will need to setup the this project on a service that can allow HTTPS OR you need a SSL Key/Certificate.
Heroku is a known service that allows for automatic SSL/HTTPS services.
If you have your own SSL Key/Certificate you will need to setup this service the following way.
In you .env file you've setup previously, change the USE_SSL field to true. Copy your ssl key and certificate to the ./keys folder found at the root of this project. In the .env file update the SSL_KEY_NAME and SSL_CERT_NAME fields to reflect the names of those files you copied.
When you run this project using yarn start it should now be using SSL on the domain name the SSL keys were created for.