Team & access
SAML single sign-on
Let your team sign in to Inworld through your own SAML 2.0 identity provider.
SAML SSO lets your team sign in to Inworld through your identity provider: Okta, Microsoft Entra ID, Google Workspace, OneLogin, or any SAML 2.0 IdP. Connect your IdP once. Everyone with an email address at one of your verified domains can then sign in through it.
SAML SSO is available on the Enterprise plan and is configured by Owners on the Domains & SSO tab of the Team page. Admins can view the configuration.
Before you start
You need all of the following:
- A Team account on the Enterprise plan. Contact sales to upgrade.
- At least one verified email domain. SSO applies only to domains you have verified. This prevents an identity provider from asserting addresses it does not own.
- Permission to create a SAML application in your IdP.
Set up SSO
Create a SAML app in your IdP
In your identity provider, create a new SAML 2.0 application and configure it with Inworld's service-provider values. These are the same for every organization, so you can enter them now:
| Field | Value |
|---|---|
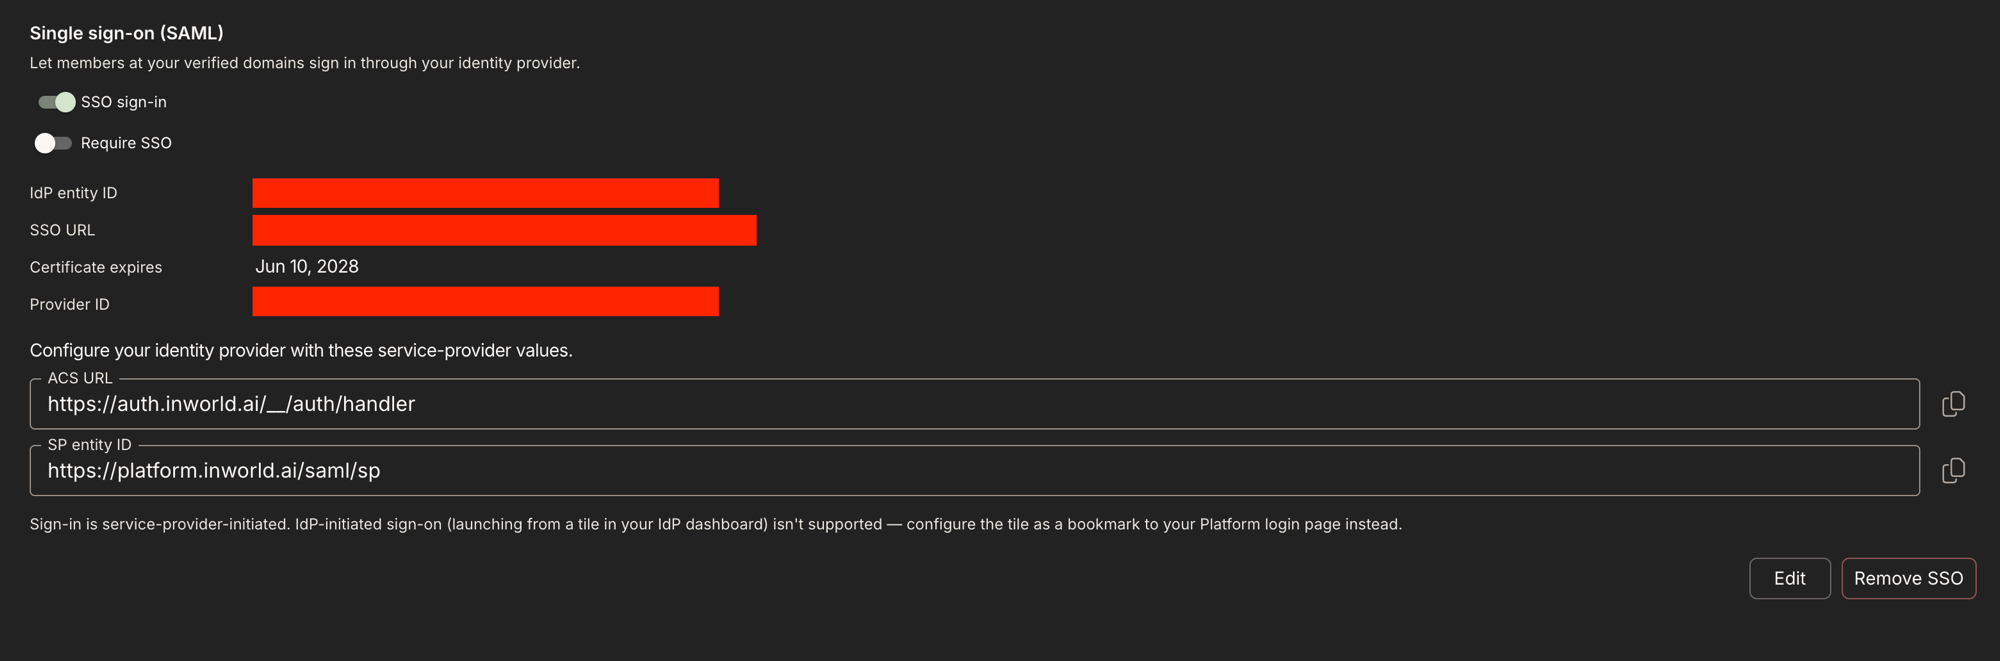
| ACS URL (Reply URL / Single sign-on URL) | https://auth.inworld.ai/__/auth/handler |
| SP entity ID (Audience URI / Identifier) | https://platform.inworld.ai/saml/sp |
To copy these values instead of retyping them, use the copy buttons on the Portal's Domains & SSO tab. They appear in the setup dialog once you save, and afterwards in the SSO summary.
Configure the app so the assertion identifies the user by their work email address. In most IdPs, set the Name ID format to EmailAddress and map it to the user's primary email. Sign-in is rejected if the assertion carries no email address.
Field reference and limits
| Field | Requirements |
|---|---|
| IdP entity ID | Required, up to 1024 characters |
| SSO URL | Required, valid https:// URL, up to 2048 characters |
| X.509 certificate | Required, PEM-encoded, currently valid (not expired, not future-dated), up to 16 KB |
How your team signs in
- On the Inworld login page they choose Sign in with SSO.
- They enter their work email. Inworld looks up which organization has that domain verified with SSO enabled.
- They are handed off to your IdP in a popup, authenticate there, and land in Inworld.
If a domain has no SSO configured, the dialog says so and steers them to another sign-in method. Users can tick Remember my email on this device to skip retyping.
First-time SSO users get an Inworld account created automatically on their first successful sign-in.
Require SSO
By default, SSO is one option among several — your team can still sign in with a password, Google, Microsoft, or GitHub. Turning on Require SSO blocks all of those for users whose email is at one of your verified domains, so your IdP becomes the only way in.
Enforcement happens on Inworld's servers at sign-in, not in the browser. A user who tries another method is signed out and shown "Your organization requires SSO" with a Continue with SSO action.
There is no break-glass exemption. Require SSO applies to every user at your verified domains, including Owners. If your IdP becomes unavailable, nobody in your organization can sign in. Causes include an expired certificate, a deleted SAML app, or a misconfigured assertion. The only recovery is to contact support to reset the configuration out of band.
Before enabling it: complete a successful test sign-in, and confirm your certificate expiry date.
Require SSO can only be turned on while SSO sign-in is enabled. Turning SSO sign-in off automatically clears the enforcement.
Rotate your signing certificate
The Portal shows your certificate's expiry date on the Domains & SSO tab. Sign-ins fail once the certificate expires, so rotate before that date.
To rotate, click Edit and paste the new PEM certificate. The new certificate replaces the old one immediately, so schedule the change for when your IdP is already serving assertions signed with the new key.
Turn SSO off or remove it
- Disabling the SSO sign-in toggle stops all SSO sign-ins and clears Require SSO. The configuration is kept, so you can re-enable it later.
- Remove SSO deletes the connection entirely. Users who signed in through SSO keep their Inworld accounts but can no longer authenticate through your IdP; they will need another sign-in method.
Both actions stay available even if your plan is downgraded from Enterprise — winding SSO down is never blocked. Setting SSO up, enabling it, changing the IdP details, or requiring it all need an active Enterprise plan.
Troubleshooting
The dialog says no SSO is set up for the domain
The domain is not verified for an organization with SSO enabled. Check that the domain is Verified on the Domains & SSO tab, the SSO sign-in toggle is on, and your plan is Enterprise. The user's email must match that exact domain. Subdomains are separate domains and need their own verification.
Sign-in fails after the IdP accepts the user
The assertion reached Inworld but was refused. Common causes include:
- The asserted email is at a domain your organization has not verified.
- The signing certificate in Inworld no longer matches the one your IdP signs with.
- The assertion carries no email address.
Re-check the Name ID mapping and the certificate, then retry.
Users see: Your organization requires SSO
Expected when Require SSO is on and someone tries a password or social sign-in. Use Continue with SSO. If SSO itself is broken, contact support to reset the configuration — there is no user-side bypass.
The certificate is rejected when saving
The certificate must be a complete PEM including the BEGIN/END CERTIFICATE lines, must currently be valid, and must be under 16 KB. Export the signing certificate (not the metadata XML) from your IdP, or paste the <ds:X509Certificate> body wrapped in the PEM markers.
The popup does not open
Browsers block popups that are not opened by a direct click. Allow popups for the Inworld login page and click Continue again.
A user launched Inworld from their IdP dashboard and got an error
IdP-initiated sign-on is not supported. Change the tile to a bookmark pointing at the Inworld login page, where the user picks Sign in with SSO.