


Get Started with Dashboards
Enable Metrics Collection
To start using dashboards, you’ll need to configure telemetry in your application:- Node.js
- Unreal
- C++
Add the following code snippet to your application:
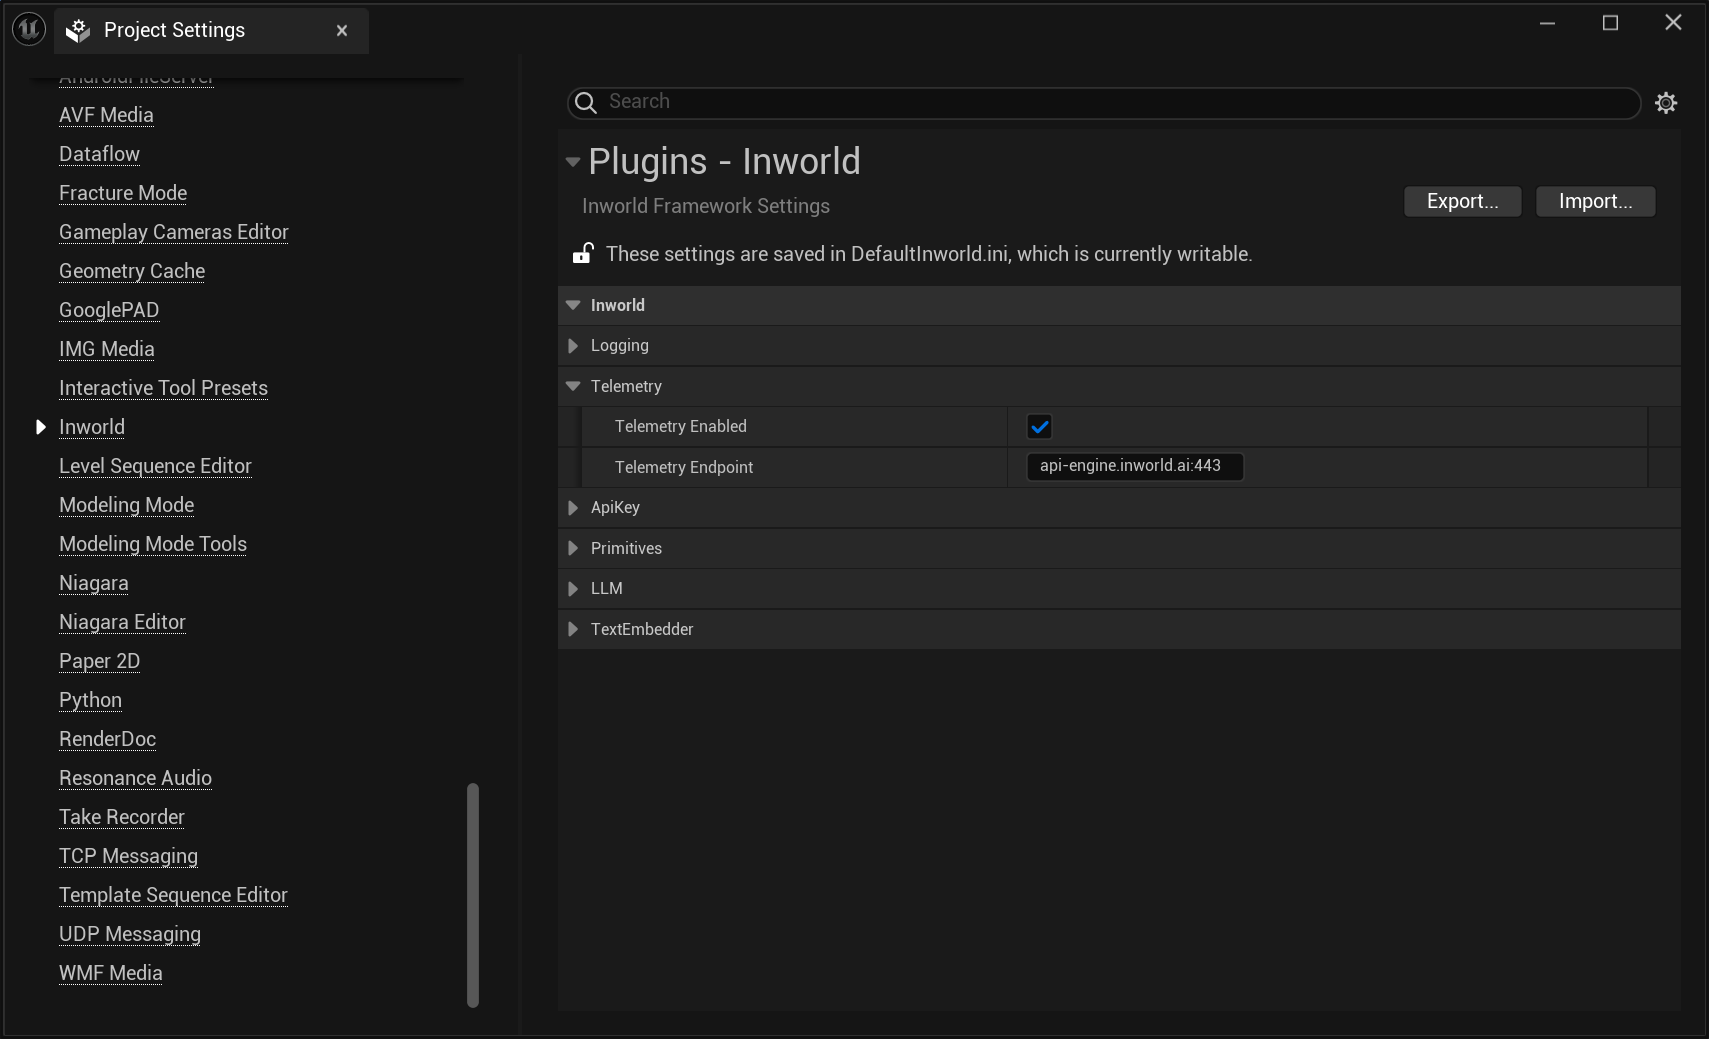
First-time users: The Dashboards tab only appears after you have run your first graph execution. If you’ve run your first execution but still don’t see the Dashboards tab, please sign out and sign back in.
View Default Dashboard
Building Custom Panels
Ready to create your own custom panels? Here’s the step-by-step process:1
Create Panel
- Click on the dashboard you want to view
- Click New Panel on the top right corner
- Select a chart type: Time Series, Number, Table, Bar, or Pie Chart
2
Build Your Query
The visual query builder makes it simple - just choose a metric and an aggregator.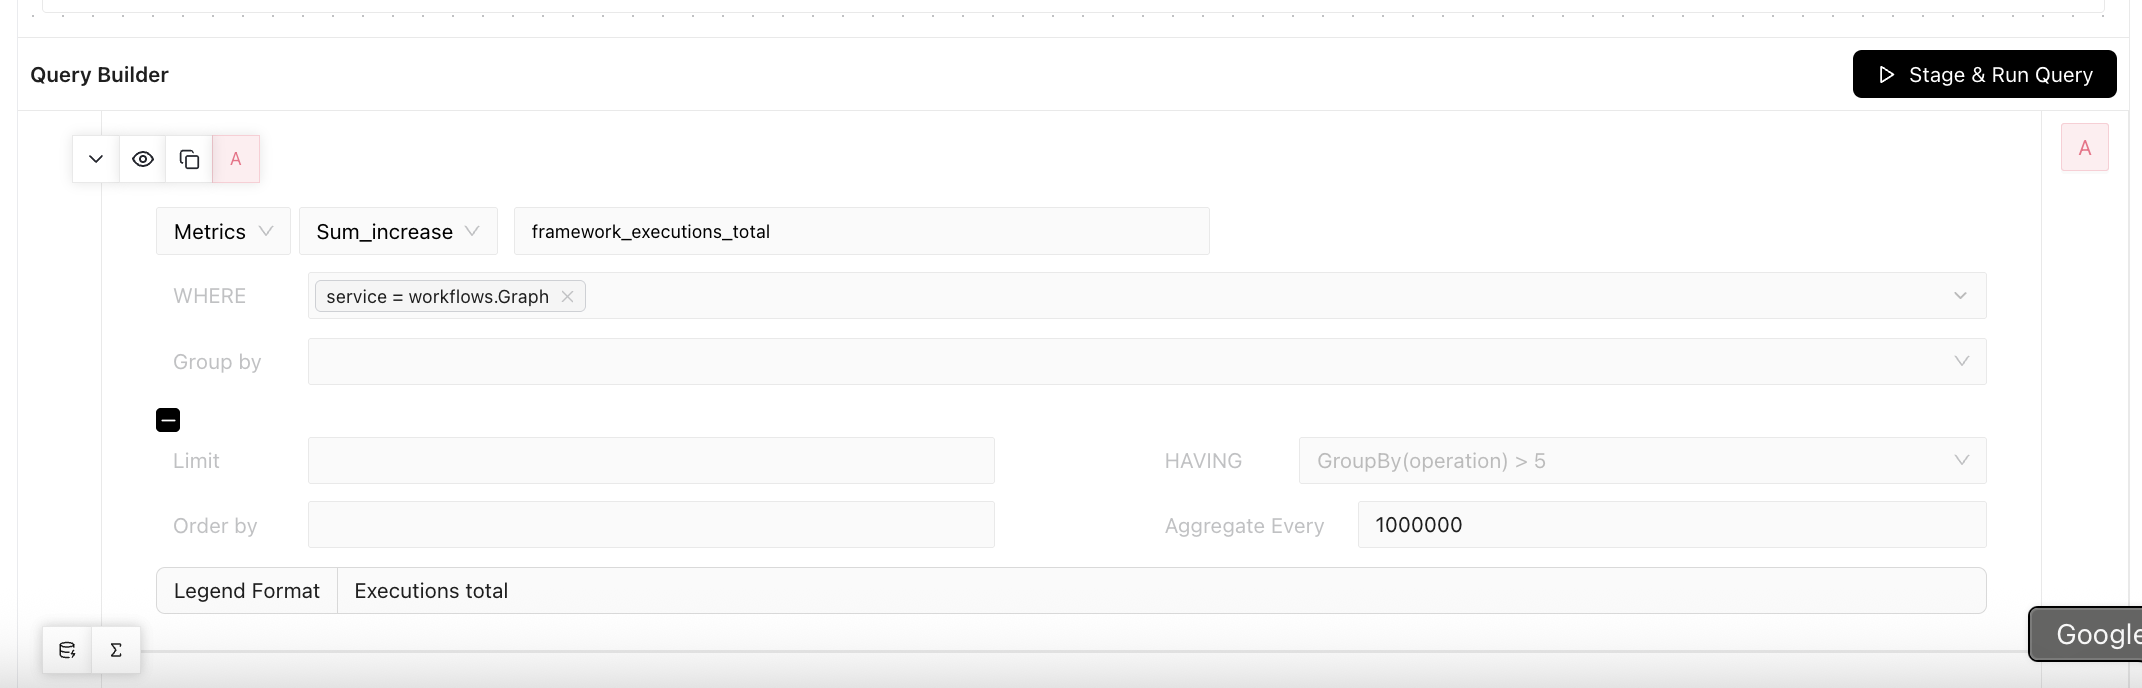

- Select a metric: What you want to measure (e.g.,
framework_executions_total) - Pick an aggregator: How to calculate values (Count, Average, P99, etc.)
- Add filters (optional): Use WHERE conditions, group by dimensions, or set time aggregation
- Click Stage & Run Query
Query Builder Guide
Essential Fields
The core fields you’ll use for most charts:Advanced Fields
For more complex queries and customization:Aggregate Operators

- NOOP: No operation - shows raw metric values without aggregation
- Count: Number of events or data points
- Count Distinct: Number of unique values
- Sum: Adds up all values within each time period (e.g., total requests per minute)
- Sum_increase: Shows increase in cumulative counters over time (e.g., how much a “total requests” counter grew)
- Avg: Average value across all data points
- Max: Highest value in the dataset
- Min: Lowest value in the dataset
- P50: 50th percentile (median)
- P75: 75th percentile (third quartile)
- P90: 90th percentile - only 10% of values are above this
- P95: 95th percentile - only 5% of values are above this
- P99: 99th percentile - only 1% of values are above this
- Sum_rate: Sum of individual rate calculations (e.g., total requests/sec across all services)
- Avg_rate: Average of individual rate calculations
- Max_rate: Maximum of individual rate calculations
- Min_rate: Minimum of individual rate calculations
Time Aggregation Settings

- Longer time ranges → Higher aggregation intervals (fewer data points, smoother charts)
- Shorter time ranges → Lower aggregation intervals (more data points, more detail)
When defaults might cause issues:
Problem: Too granular (gaps in chart)
- When: Sparse data + short time range (e.g., events every 5 minutes but aggregating every 1 minute)
- Result: Lots of empty intervals, choppy chart with gaps
- Fix: Increase Aggregate Every (e.g., change from 60 to 300 seconds)
- When: Frequent data + long time range (e.g., events every 30 seconds but aggregating every 5 hours)
- Result: Important spikes and patterns get smoothed out
- Fix: Decrease Aggregate Every (e.g., change from 18000 to 3600 seconds)
Next Steps
Ready to grow your business metrics? Check out the resources below to get started!A/B Experiment Best Practices
Run robust A/B experiments and optimize your metrics
Quickstart
Learn how to build a simple chat experience using the Node.js SDK