Animations
Animations in our Unity SDK are triggered via EmotionEvents that we receive from the server.
Some of the current animations in the character's animator would never be triggered by our current EmotionEvents.
You can instead trigger those animations with your own implementation or OnEvent calls from other script logic.
Additionally, it is recommended that you import your own animation clips, and set them as states of our Animator Controller if you need to extend the current animations available.
Demo
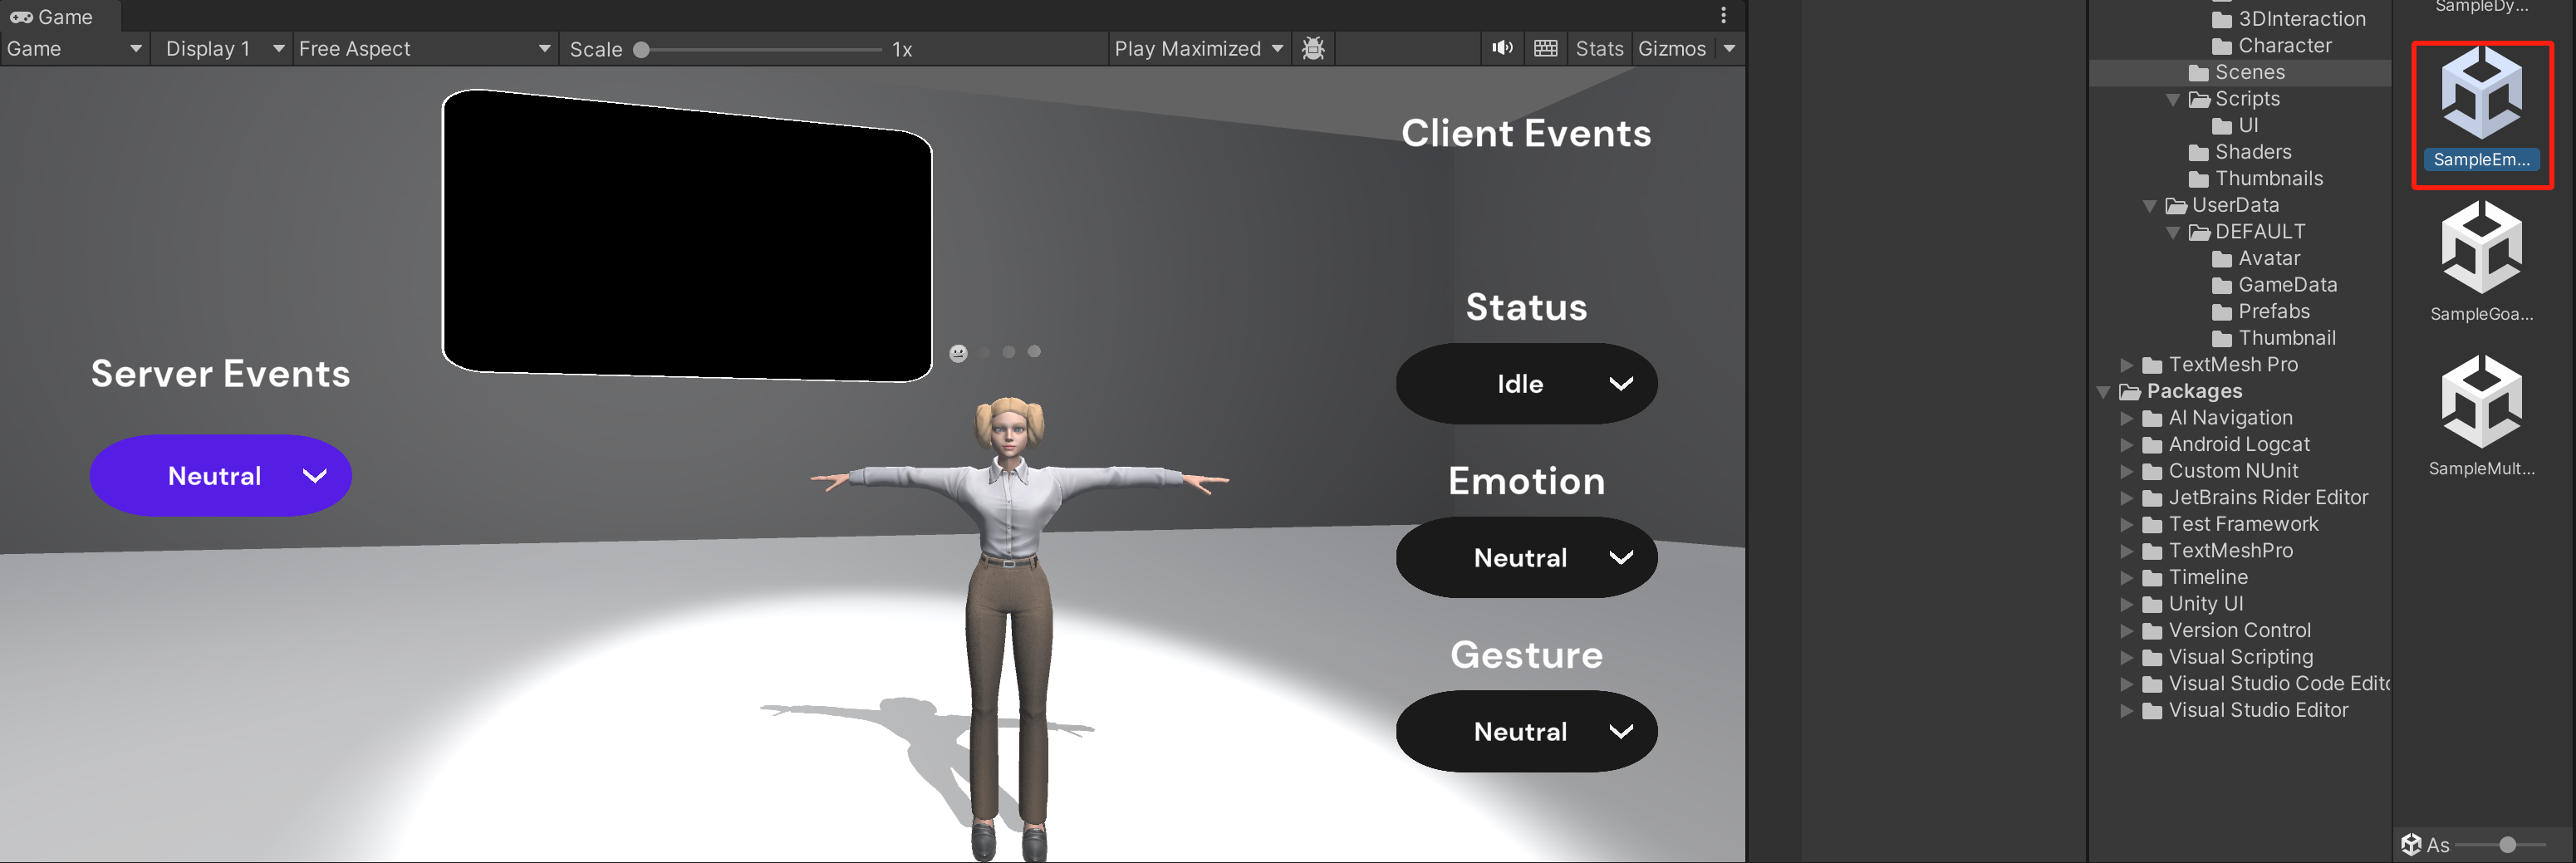
Before you go through this page, we recommend you check the Emotion Sample Demo Scene or our Unity Playground demo.
Architecture
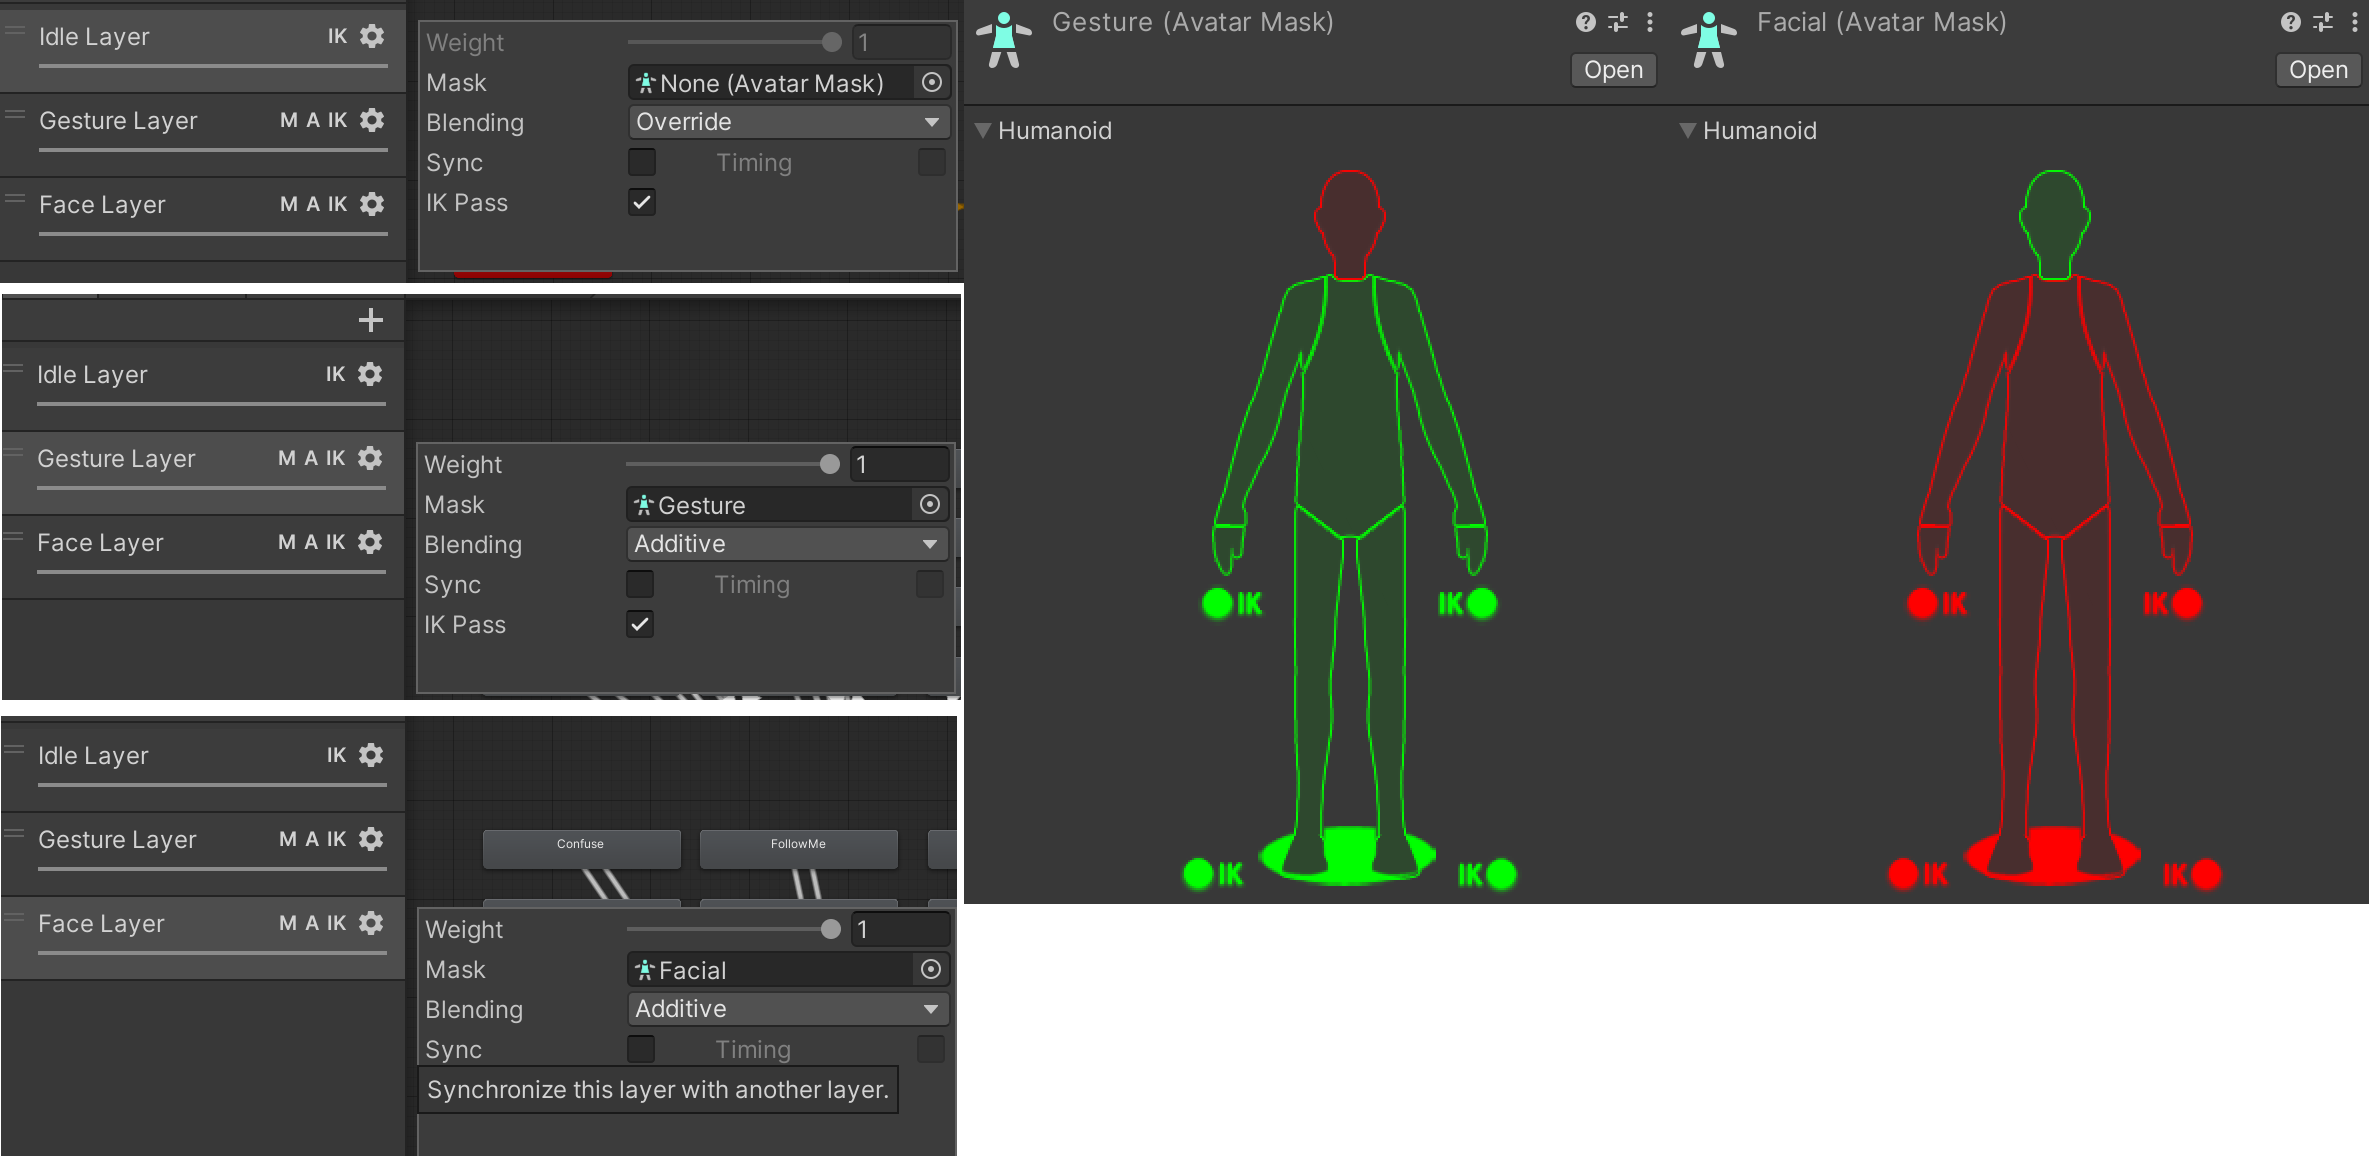
Our animator is called InworldAnimCtrl. It contains three different layers. These are the Idle Layer, the Gesture Layer, and the Face Layer. Please note the following,
- All three layers can pass IK data
- The Gesture Layer and Face Layer are additive to the Idle Layer
- The Face Layer masks faces only
- The Gesture Layer masks all the other parts of the character except the face
1. Idle Layer
The Idle layer is triggered by the following game logic,
- Once the client and server established connection, when you face your character, it switches to a
Hellostate. - The character that was previously communicating will switch to a
Goodbyestate - When the current character receives audio, it will switch to a
Talkingstate - Based on breaks in the audio, the character will switch between
TalkingandNeutralstates
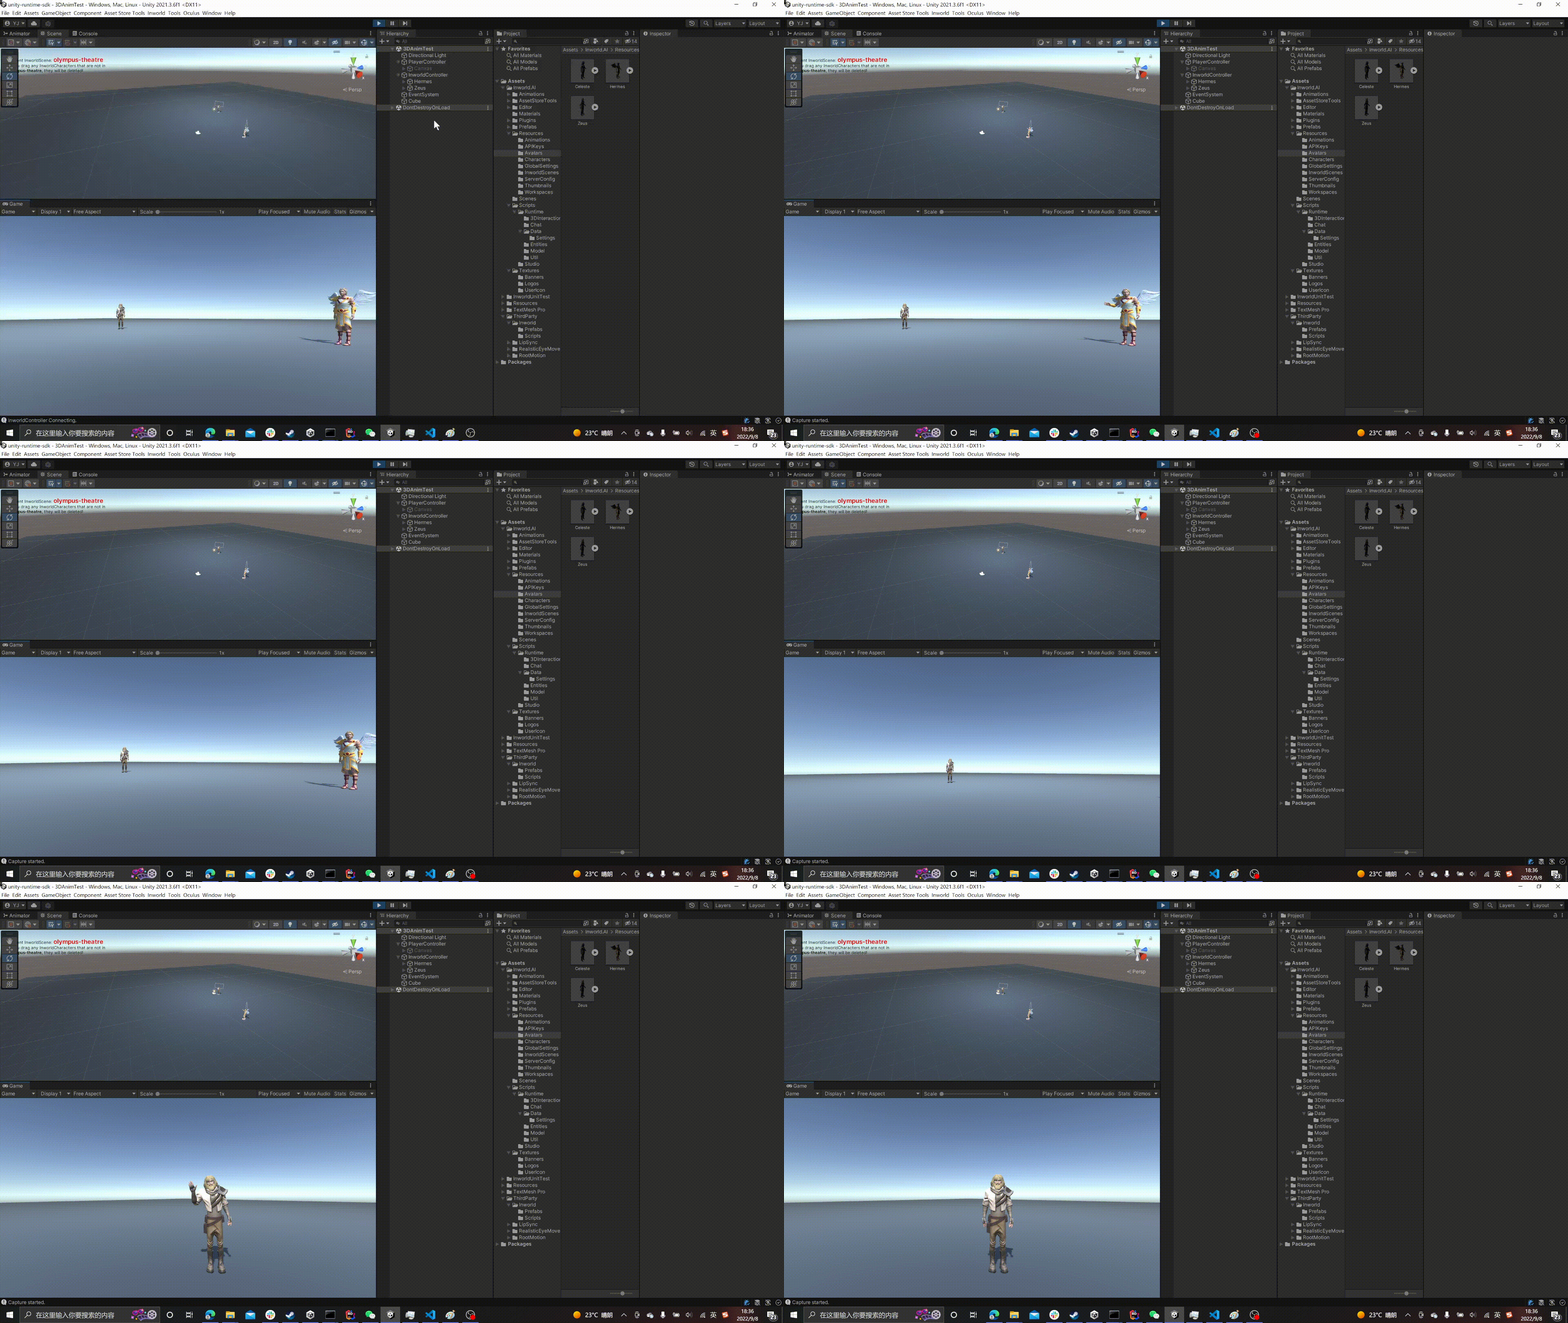
In an Idle or Talking state, we have provided various types of Idle or Talking behavior based on the emotion of the character. These are triggered by EmotionEvents from the server.

2. Gesture Layer
The gesture layer is triggered via EmotionEvents sent by the server.
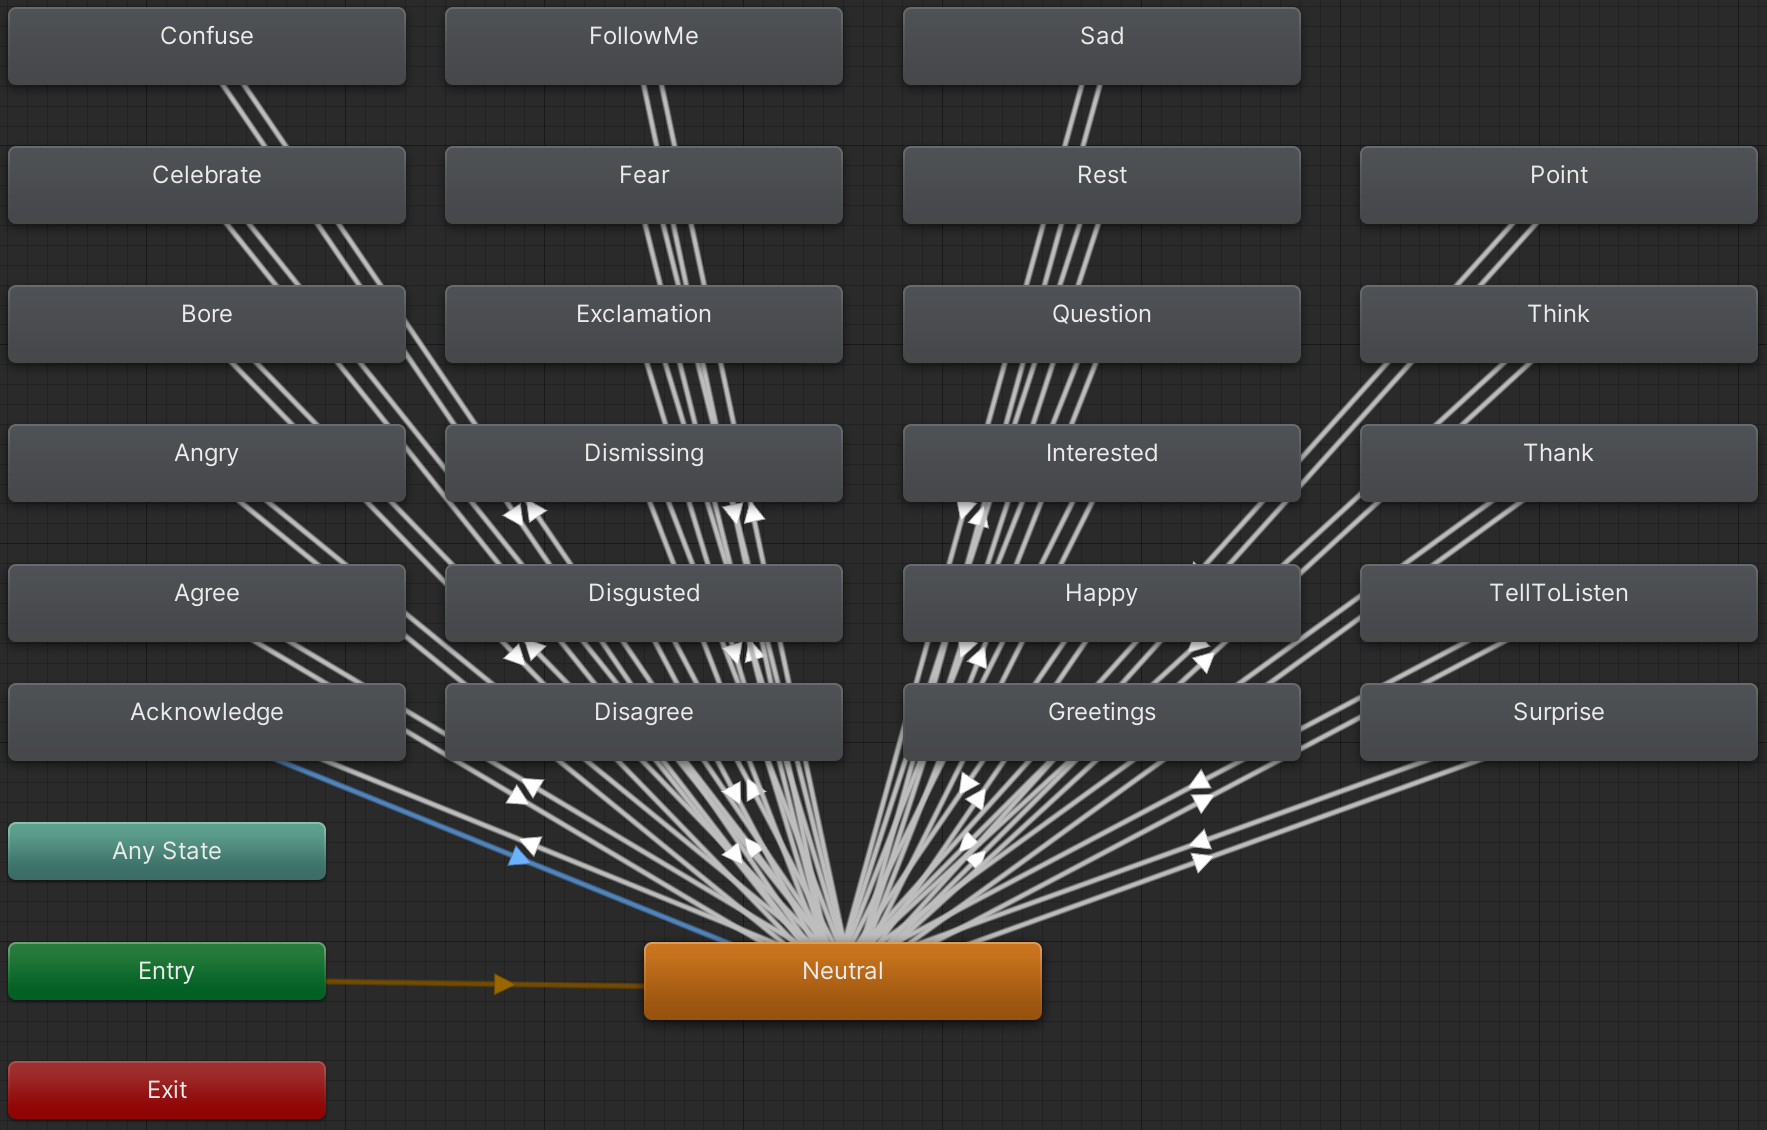
3. Face Layer
The face layer is an interface that only has NeutralIdle. We implemented facial expressions by modifying Blend Shapes directly on this state, via EmotionEvents sent by the server.
Interaction with Server
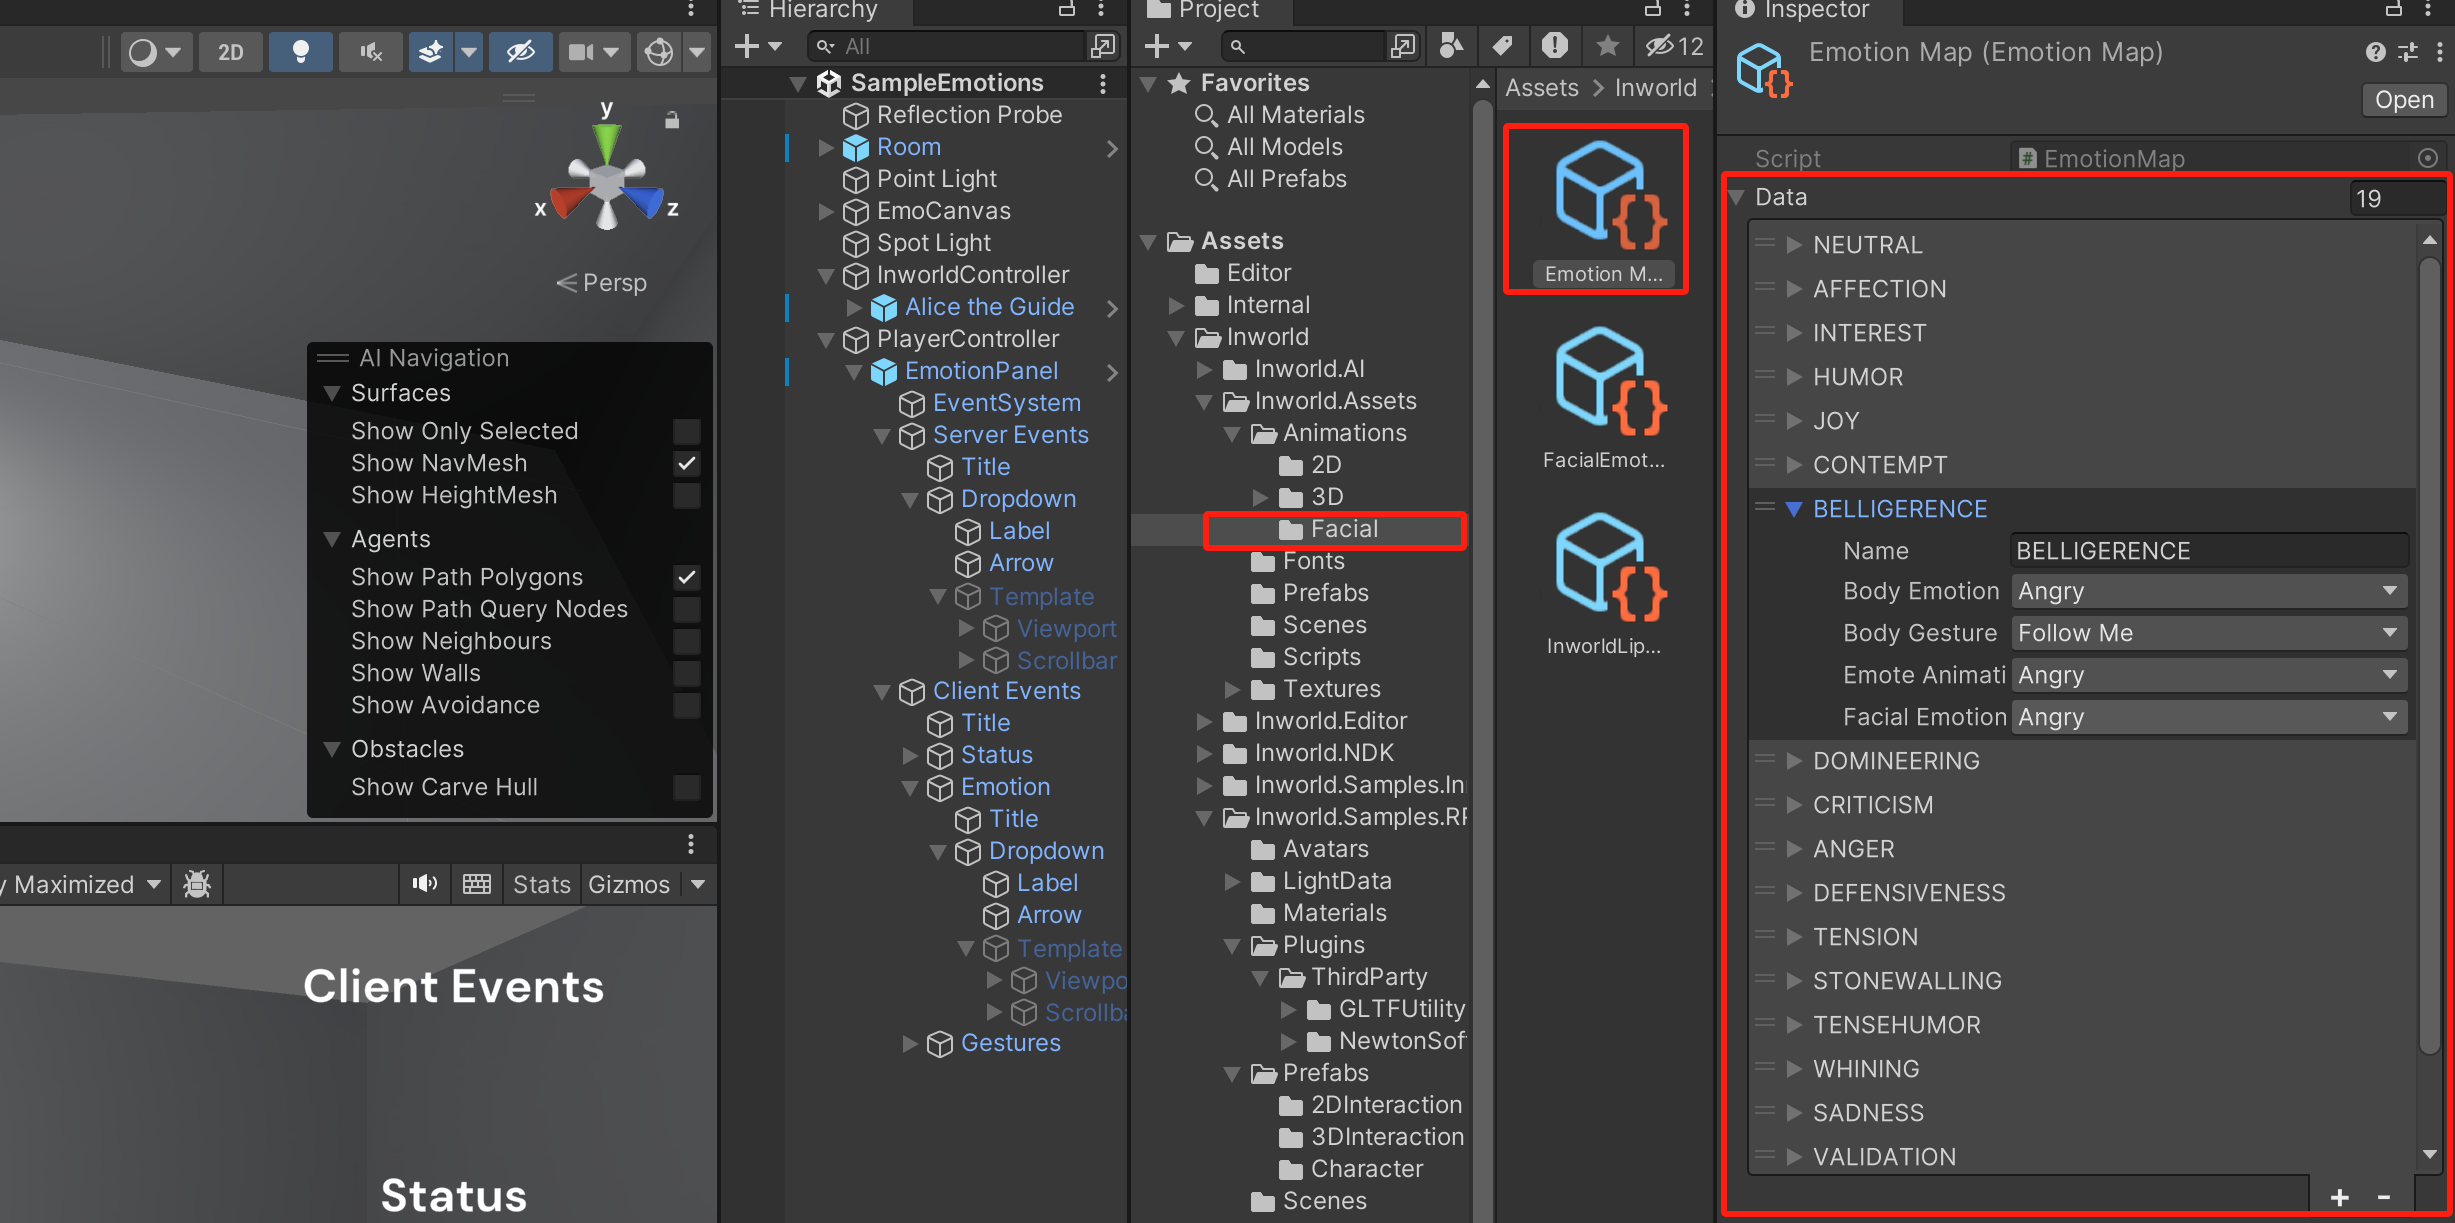
In live sessions with a character, the server will occasionally send EmotionEvents based on the current dialog context. Our code will catch these events and display the appropriate animations. However, our animations and the server events are not in a one-to-one correspondence.
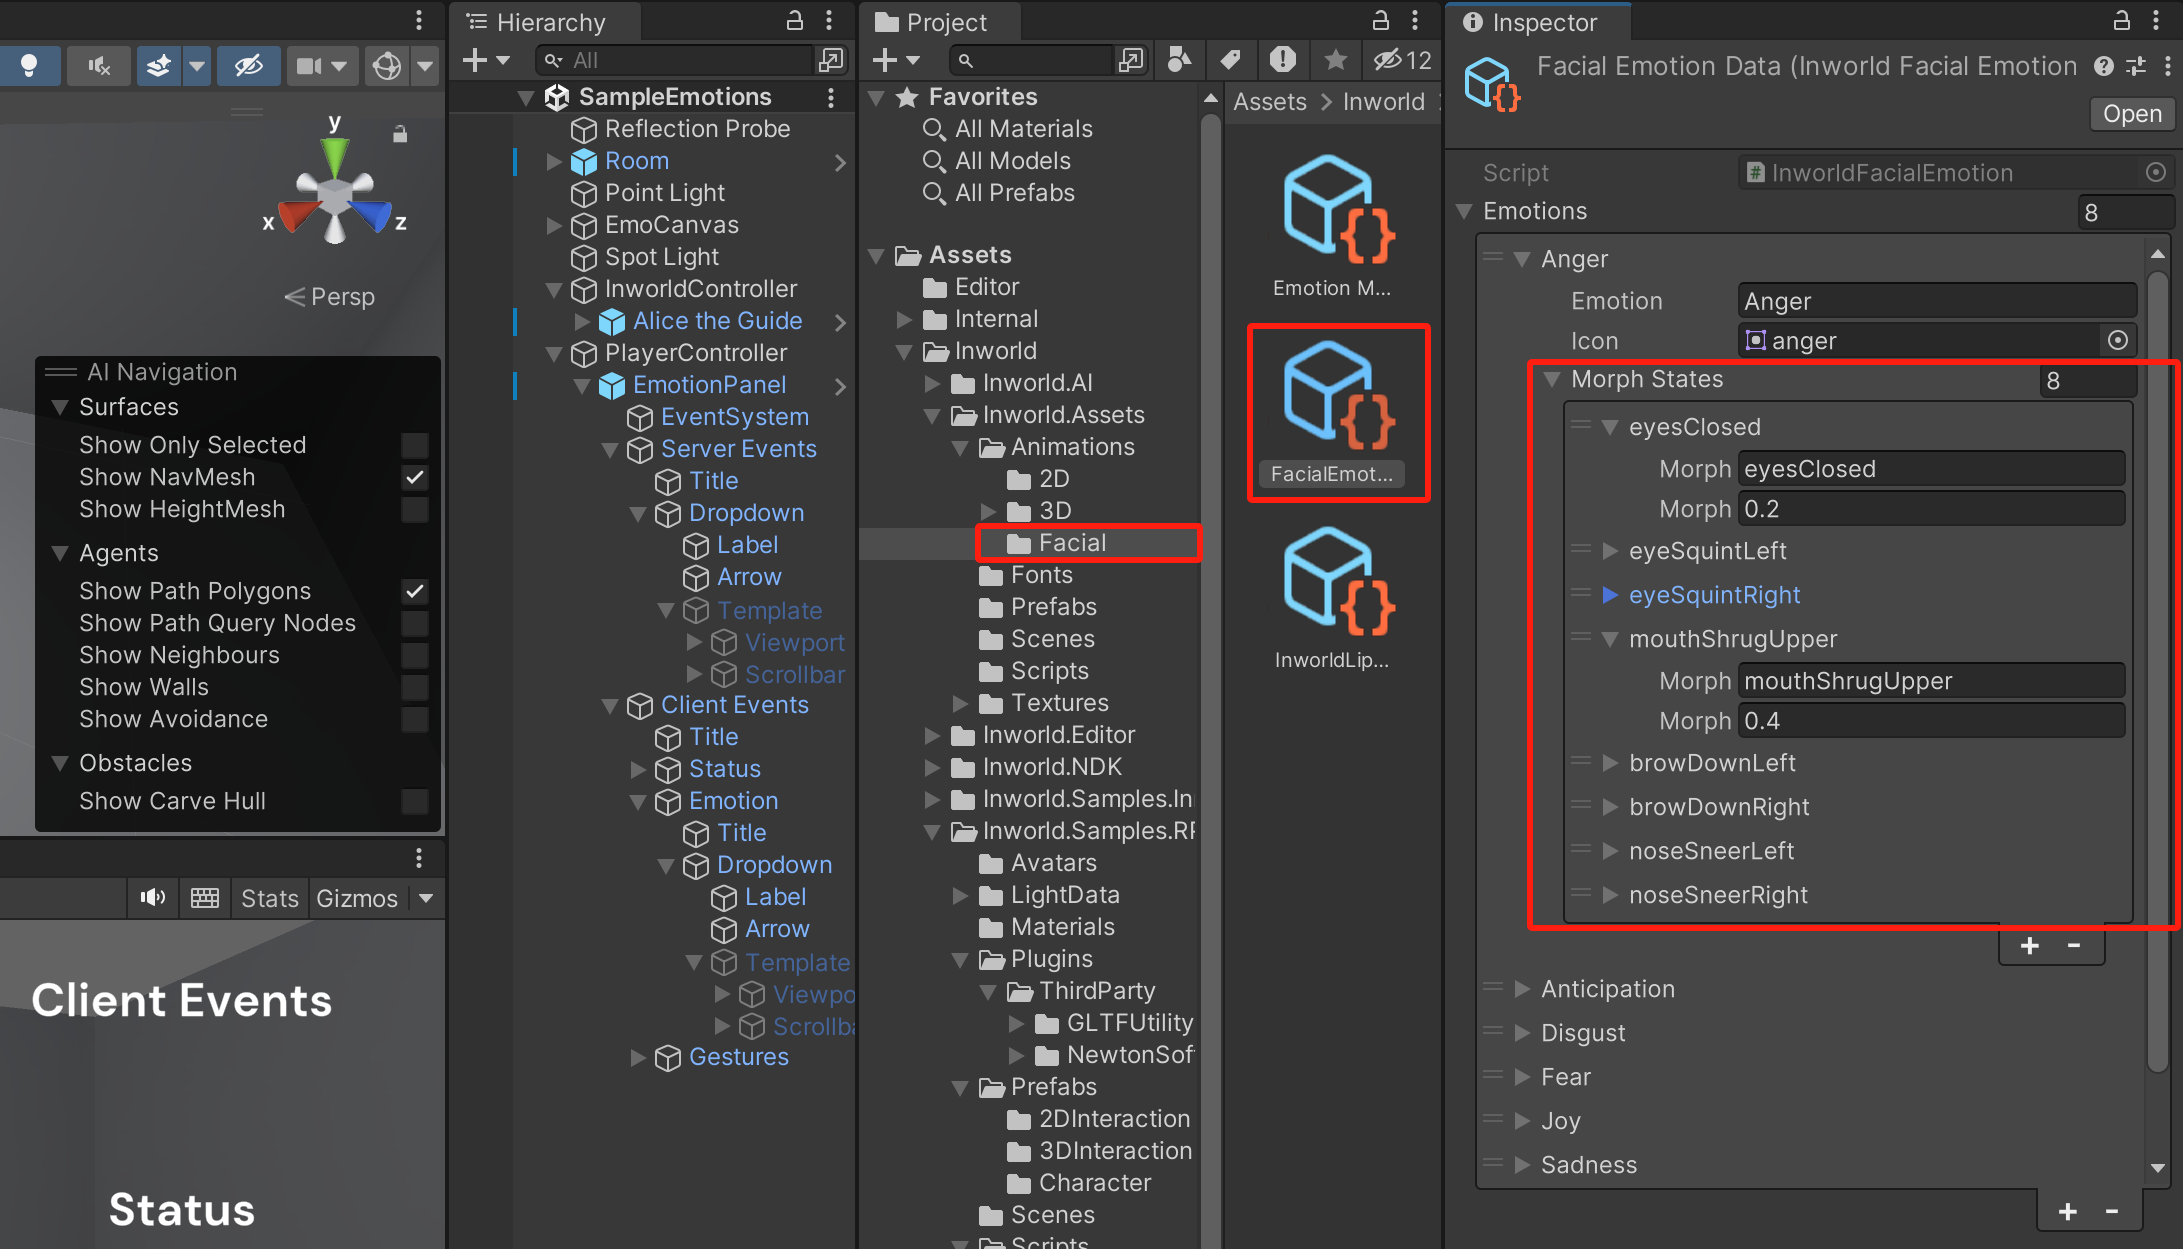
If you are interested in the mapping, please check our EmotionMap in Assets > Inworld > Inworld.Assets > Animations > Facial.
For how to apply those animations in code, please check BodyAnimation::HandleMainStatus()and BodyAnimation::HandleEmotion() for more details.
Using your own custom body animations
You may have noticed that legacy characters offered through Ready Player Me Avatar are not T-Posed when you generate them from the studio website. We recognize that this can make it difficult to perform animation re-targeting. However, Ready Player Me Avatar does support Mixamo animation. To solve this problem, you can upload to the Mixamo server and download the uploaded fbx to replace any of our existing animations.
You can also replace the animations in our default animation controller that we have provided with your own correctly (humanoid) rigged animations, either via Mixamo character upload or your own existing animations.
1. Importing the Ready Player Me SDK
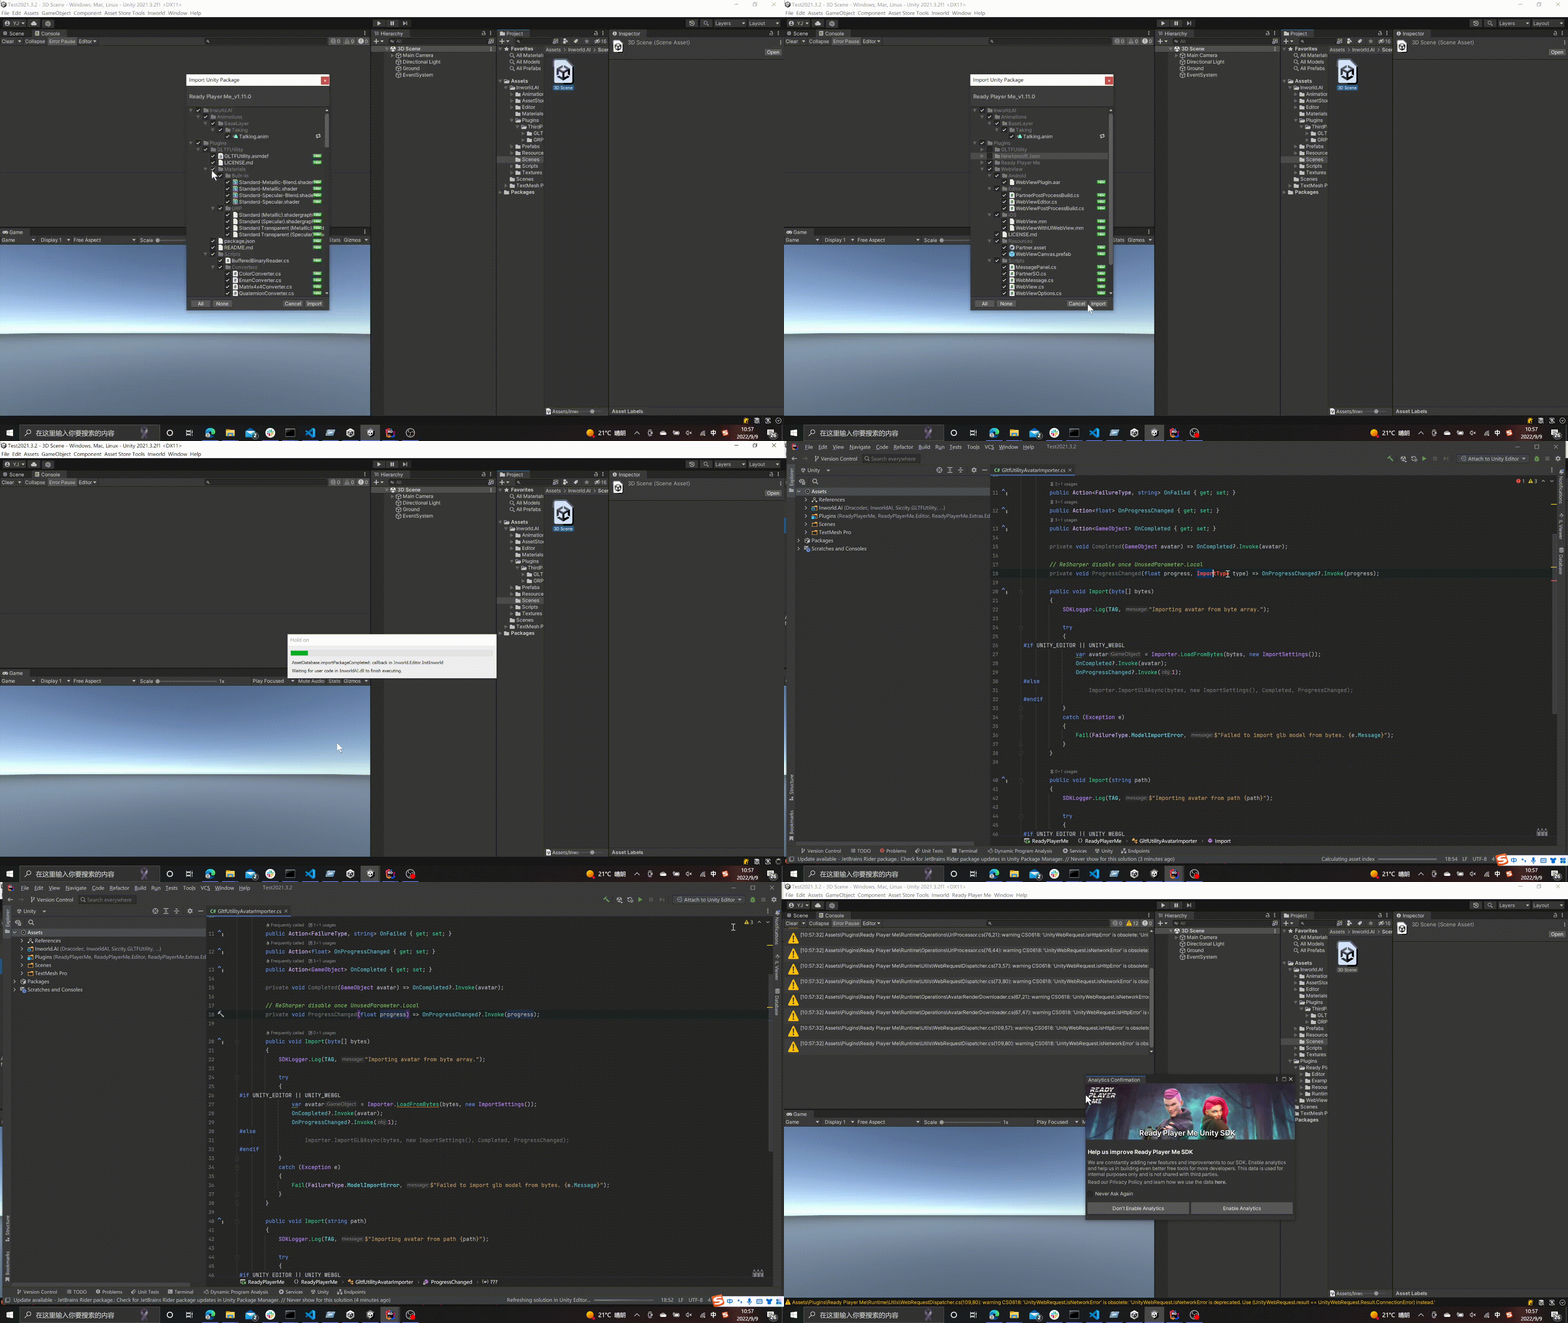
Please visit this site to download the latest Ready Player Me SDK. Note the following,
- The Ready Player Me SDK, as well as Inworld AI, uses GLTFUtility as the
.glbformat avatar loader - Newtonsoft Json was officially included in Unity since 2018.4. When you are importing a package, please exclude these two plugins to avoid a possible conflict.
- There is a small API formatting bug that involves GLTFUtility. It can be solved as follows,
2. Downloading Mixamo animations
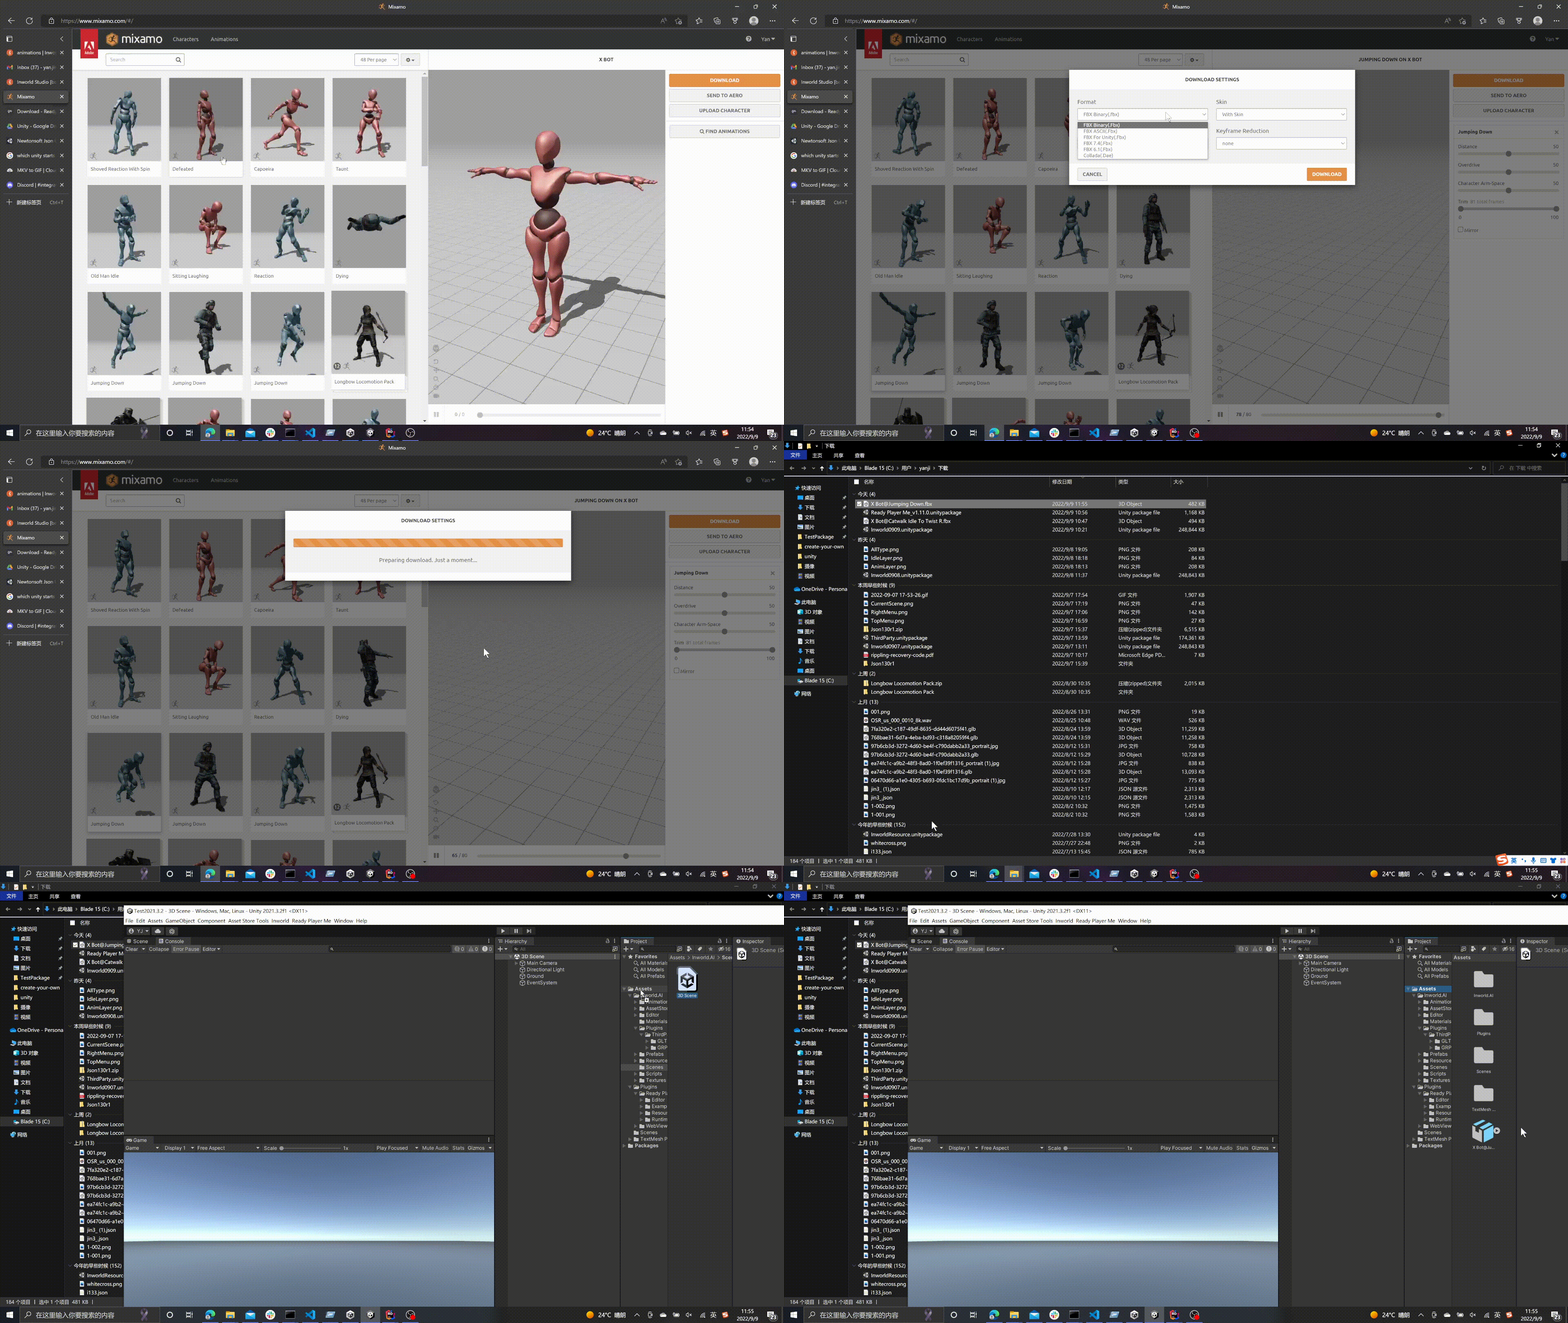
⚠️ Note: To use your own animations, please select
Upload Characteron the Mixamo website.
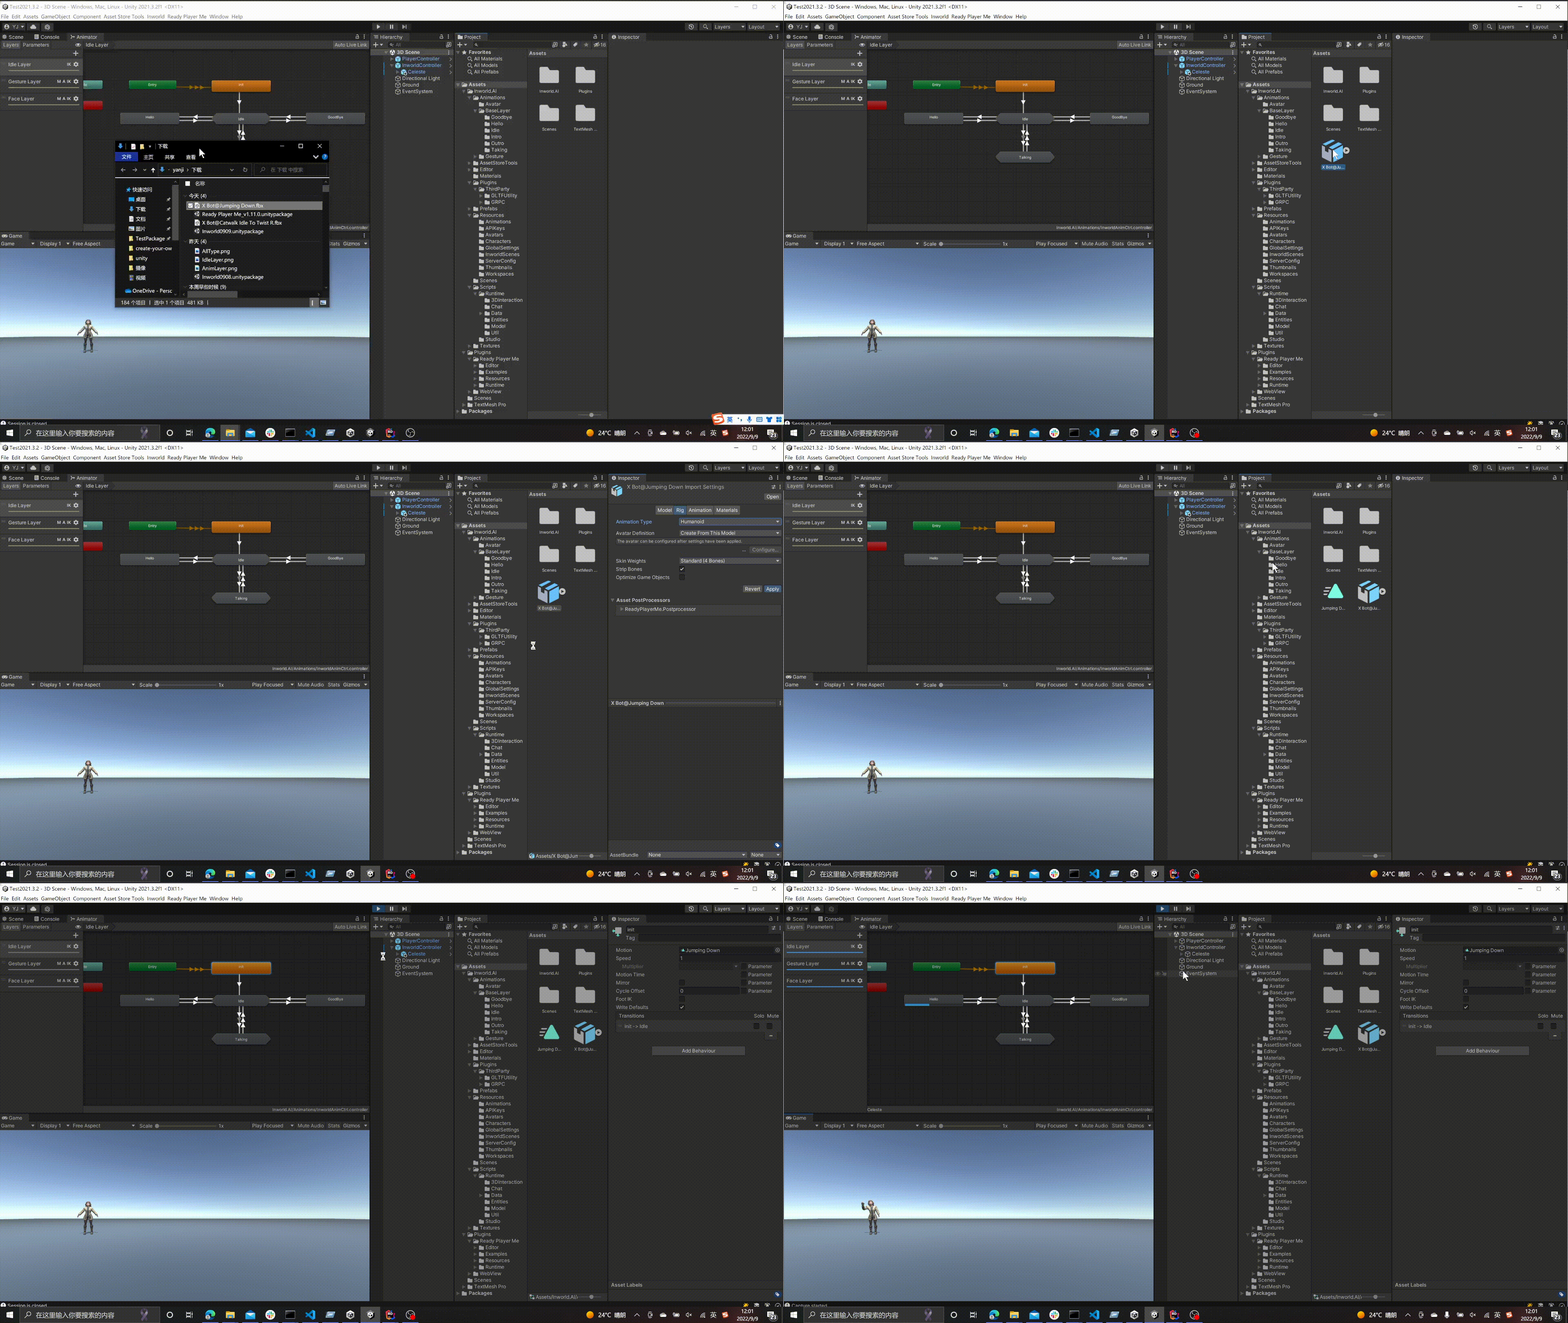
When you are downloading the fbx from Mixamo, select Fbx for Unity, and Without skin. Drag it into Unity's Assets folder. These steps are shown below:
3. Replacing animations
⚠️ Note: The default animation type in the
fbxyou downloaded from Mixamo isGeneric, which you CANNOT re-target.
To solve this:
- Select the
fbxthat you imported atRigsection. - Switch the
Animation TypetoHumanoidand clickApply. - Right-click the
fbxand chooseExtract Animations. This function is provided by the Ready Player Me Unity SDK, and it will generate anAnimation Clip. - You can select any state in
InworldAnimCtrland replace theAnimation Clipwith your new clip. This is shown below:
Configure your custom facial animations
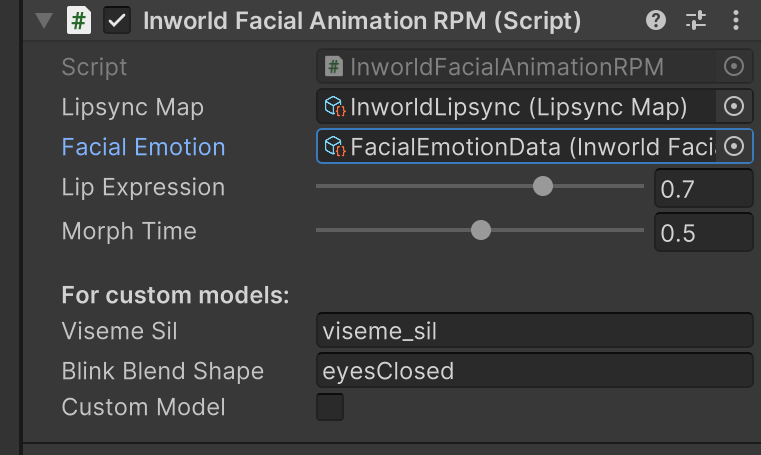
Instead of using Animation Clips, we directly modify the Blend Shapes on the SkinnedMeshRenderer of the avatar. You could check each state of FacialEmotionData at Assets > Inworld > Inworld.Assets > Animations > Facial.
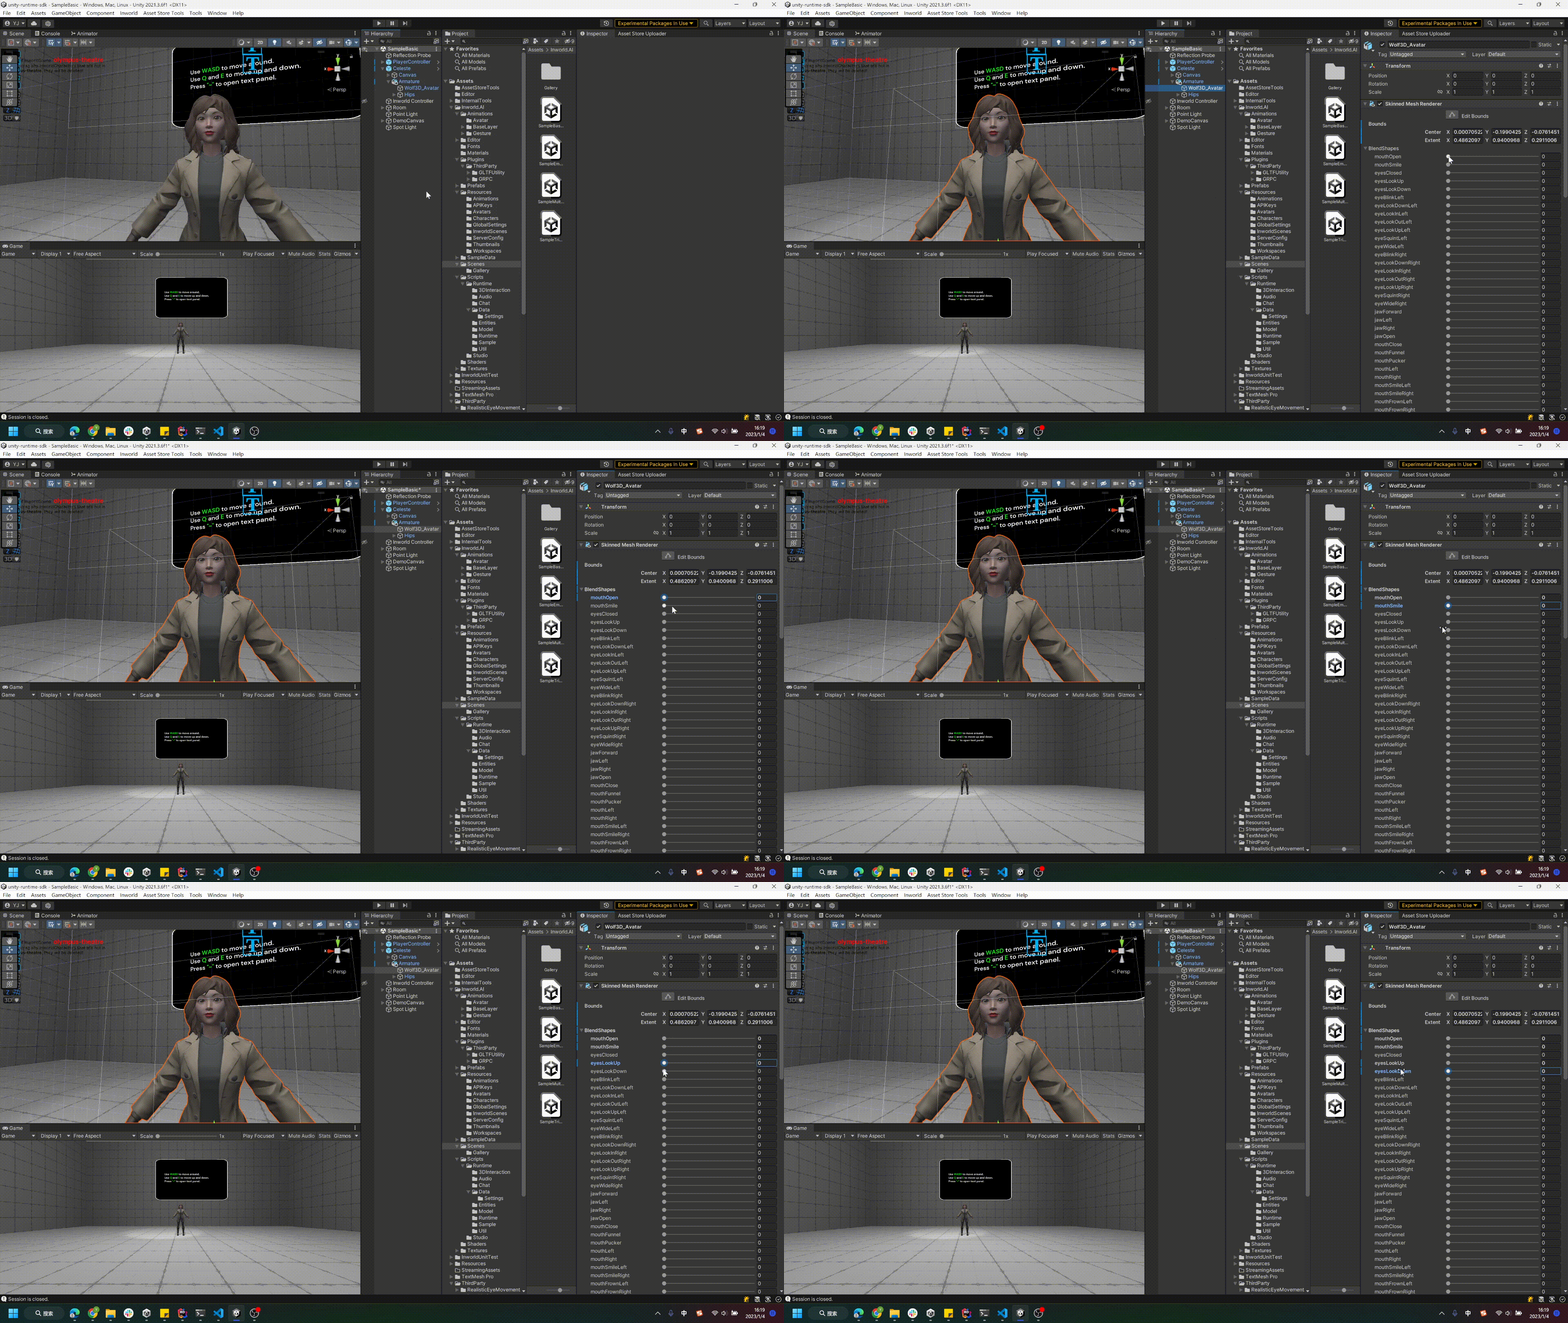
If you want to modify the facial expression for a character's emotion, you can try moving around the sliders for each blend shape on the SkinnedMeshRenderer. Once you have created an expression you like, you can update the Facial Emotion Data with these values for that emotion's Morph States.
⚠️ Note: We recommend you duplicate this FacialEmotionData, then update and allocate your cloned asset to your InworldCharacter's InworldFacialAnimation.
