Setup
After you import the Inworld Playground project into Unity the first step is to play through the Setup scene. The setup process involves cloning the Playground workspace into your account on Inworld Studio and then linking that workspace with your Unity project.
You can get started by running any scene in the Assets/Inworld/Inworld.Playground/Scenes folder. Regardless of which scene you pick you will be rerouted to the Setup scene to perform the initial setup process.

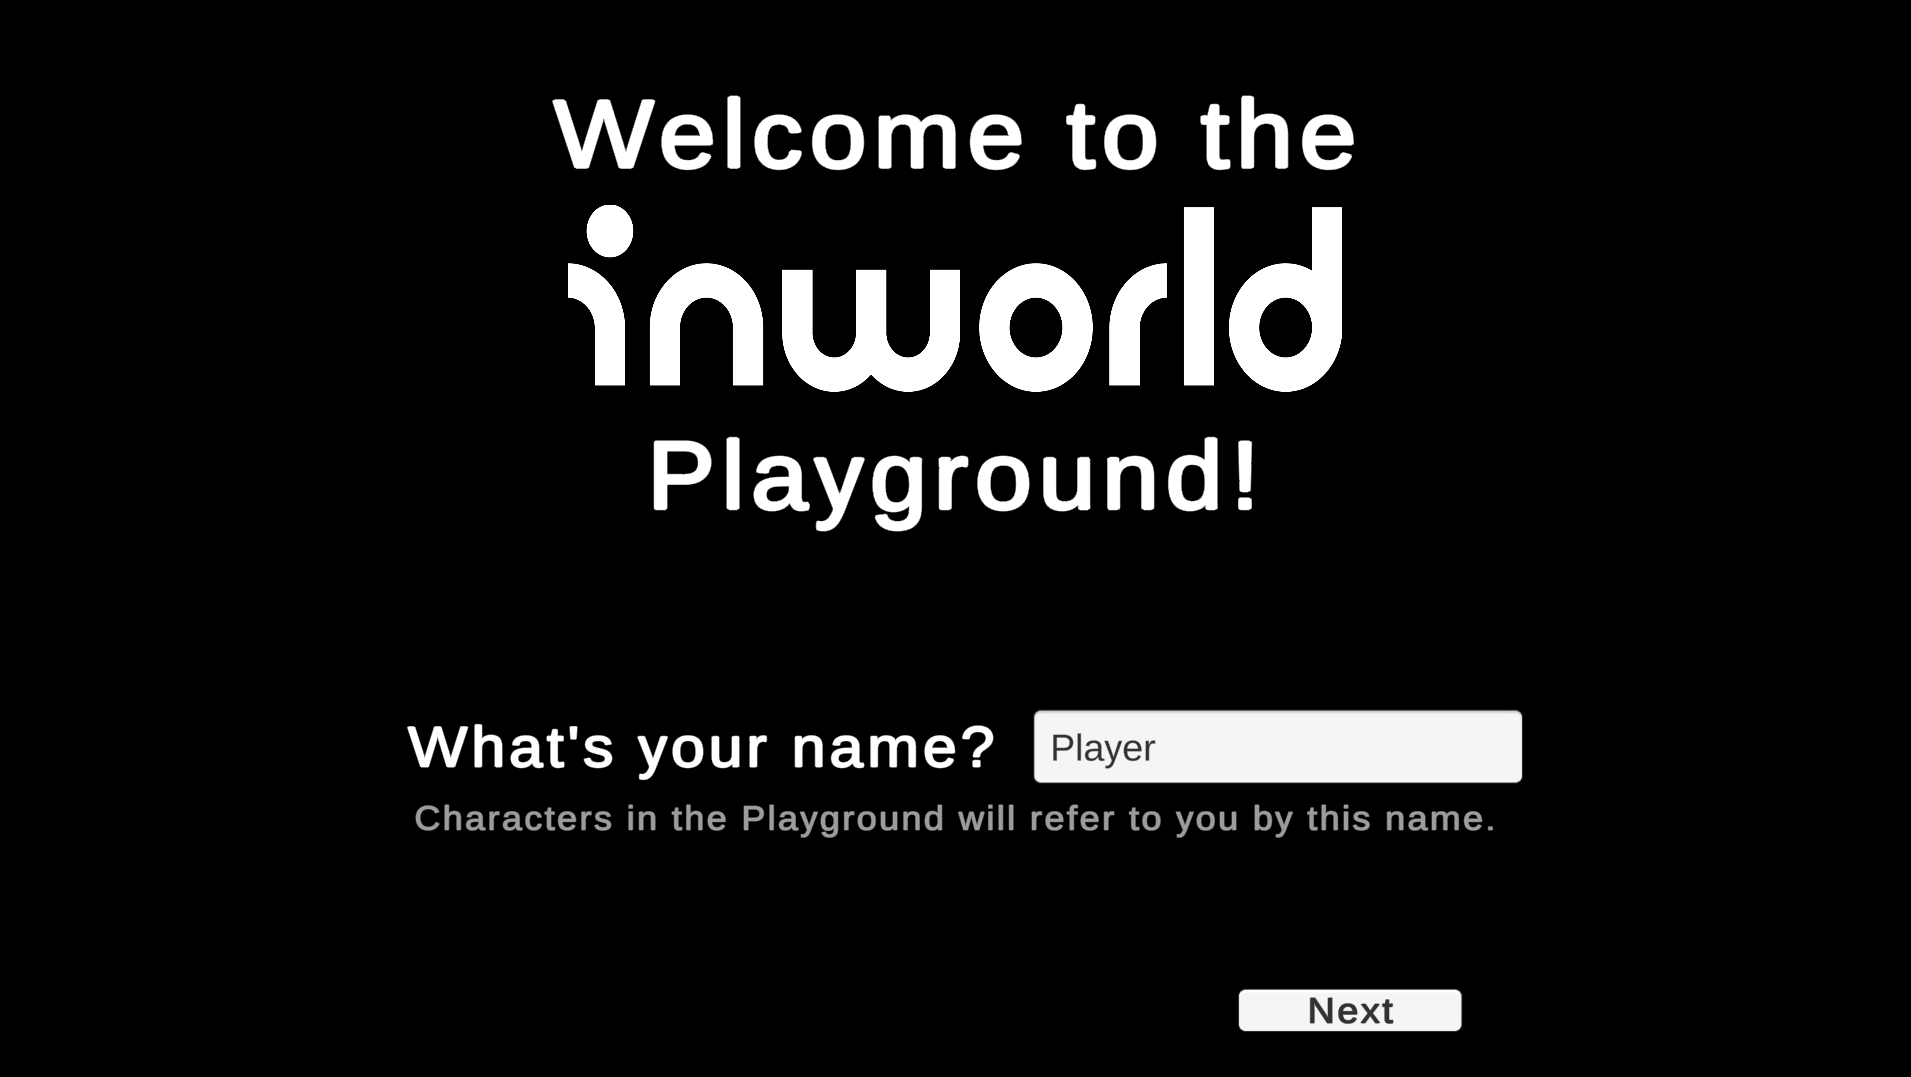
Welcome Page
When you play the Setup scene you will be greeted with a welcome screen. Here you can enter your name so that Inworld characters will know how to refer to you when speaking.
Navigation
The Playground Setup scene is made up of a number of pages, each with different instructions to follow. At any time you can move sequentially back and forth between pages using the Back and Next buttons. Sometimes the Next button will be locked until an input field is properly filled out.

⚠️ Note: If you have already run through the Setup process previously you will automatically jump to the Settings Page after completing the Welcome Page. In order to modify the setup properties you can press the
Backbutton to return to the previous pages.
1. Cloneable Workspace Page
The first step in the setup process is to clone the Playground workspace into your Inworld Studio account. The easiest way to do this is to click the URL button to follow the link which will take you to Inworld Studio. Once you have created an account and logged in you will be faced with an Import workspace panel with a button to confirm the importing of the Inworld Playground workspace.
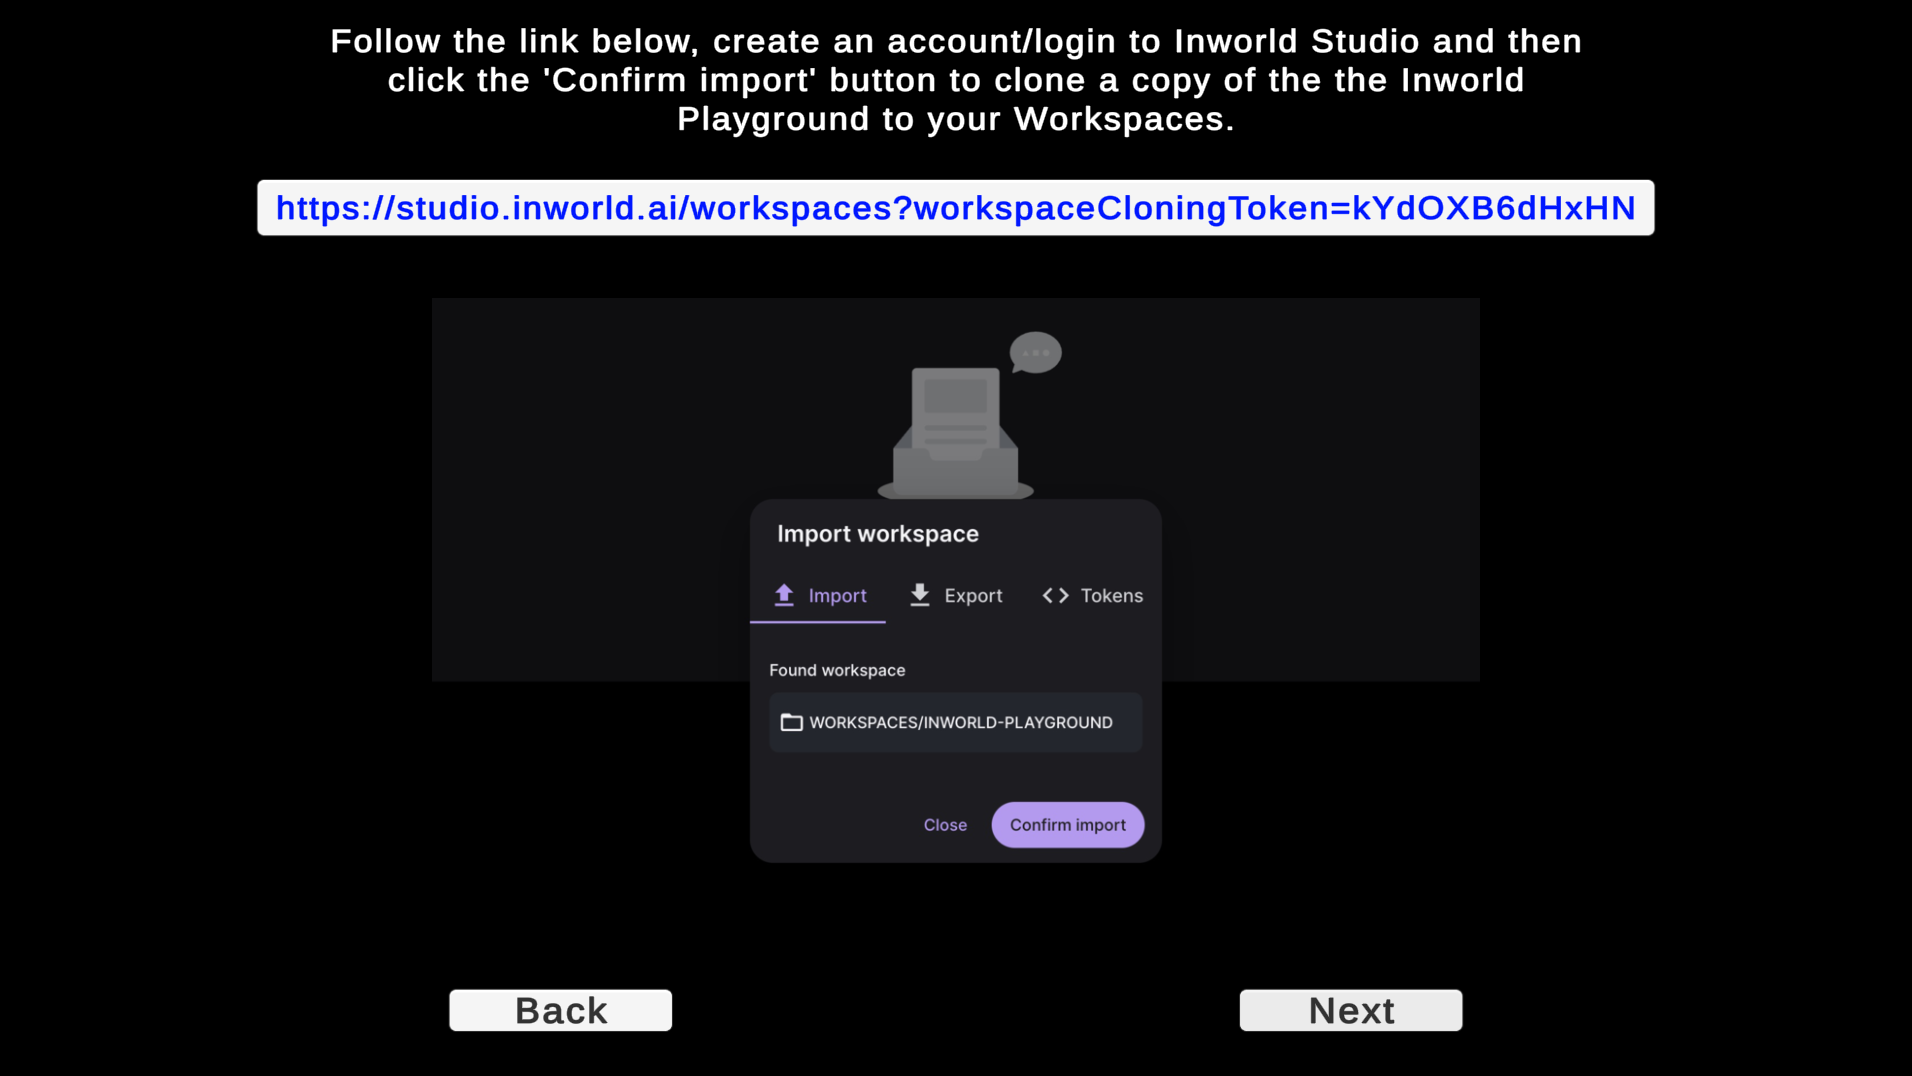
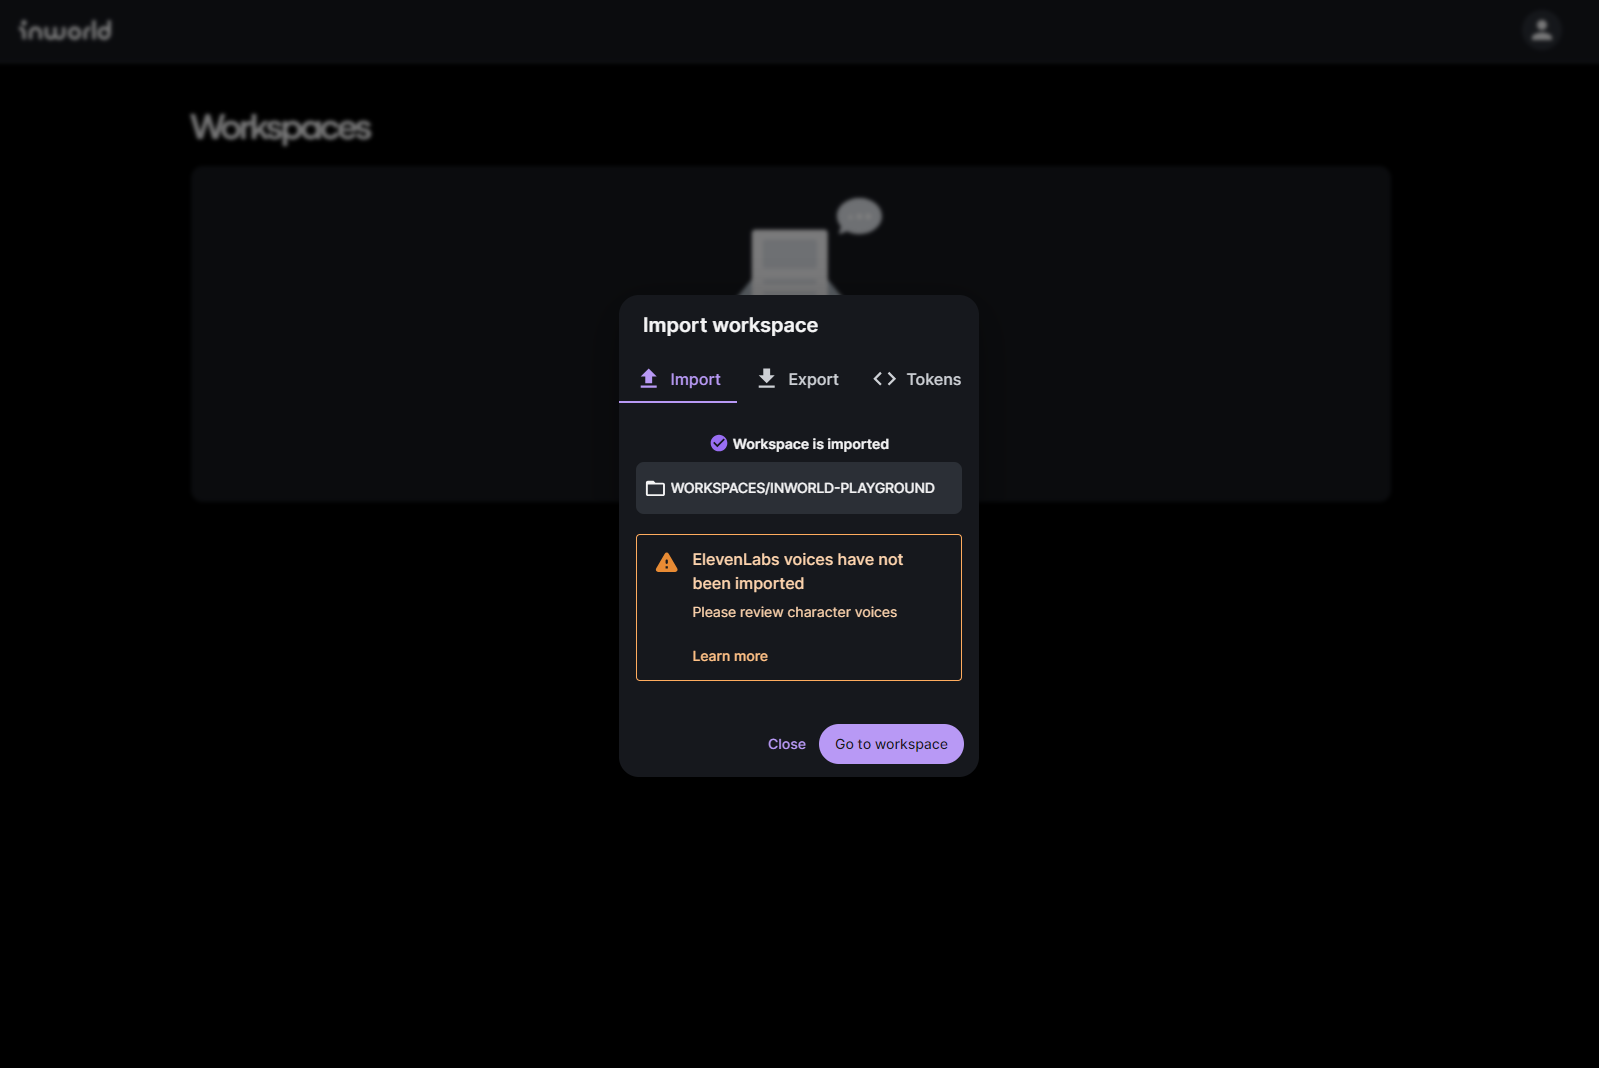
Once you click Confirm import the workspace will be added to your account and appear in your Workspaces. This may take a few seconds to complete, afterwards you will see the Workspace is imported text appear and a pop-up letting you know that the Workspace ID has been copied to your clipboard. This ID is important for the next step.
At this point you can return to Unity and click Next.
2. Workspace ID Page
The next step is to enter your workspace ID copied from the previous step. Simply copy and paste your clipboard into the input field on the current page. It should look similar to the one in the image below (ensure to include the "workspaces/" portion of the ID).
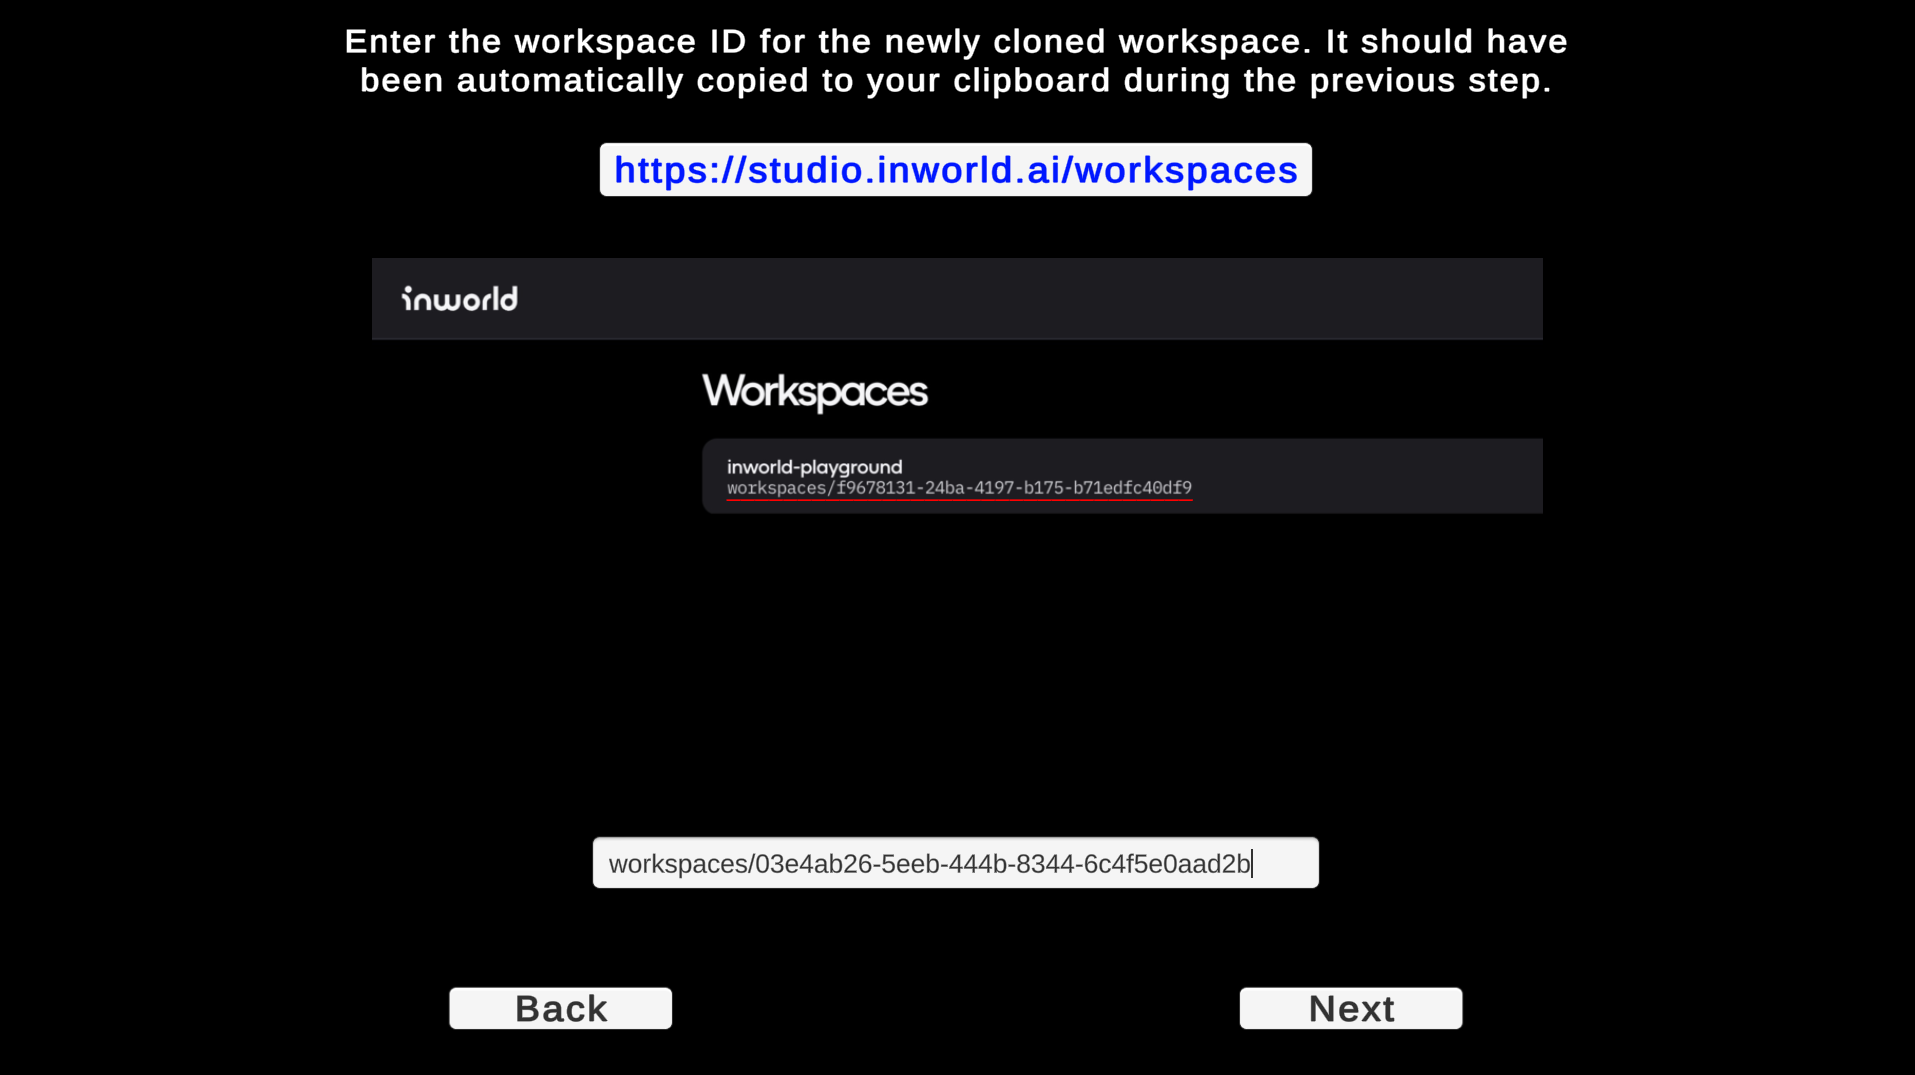
⚠️ Note: If the Workspace ID was not copied to your clipboard in the previous step, it can be found on the Workspaces page of Inworld Studio under the name of the inworld-playground workspace. See the red underlined text in the image above.
Once the workspace ID has been input you can click the Next button to move on to the next step.
3. API Key Page
The final step is to enter a base64 authorization signature into the input field on this page. Follow the link button in Unity, it will take you to the Integrations page in Inworld Studio. From there you can generate a new API Key by clicking the Generate new key button under the API Keys section.

Then click the Copy Base64 button next to your API Key to copy the base64 authorization signature to your clipboard. Finally, you can paste this signature into Unity and click Next to complete the cloneable workspace setup.
Game Data
Upon completing the cloneable workspace setup a new Inworld Game Data object will have been created. This object stores the workspace ID, API key and secret for the cloned Inworld Playground workspace in your account.
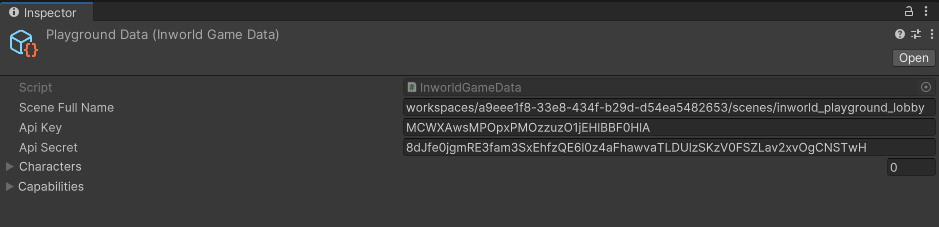
The default location is within Assets/Inworld/Inworld.Playground/GameData. The file is named PlaygroundData.asset.

Now that this Game Data object is generated you can run any scene in the Playground project.
Settings
Once you complete the cloneable workspace setup you will reach the Settings page where you can modify various settings to test out different features in the Playground demo.
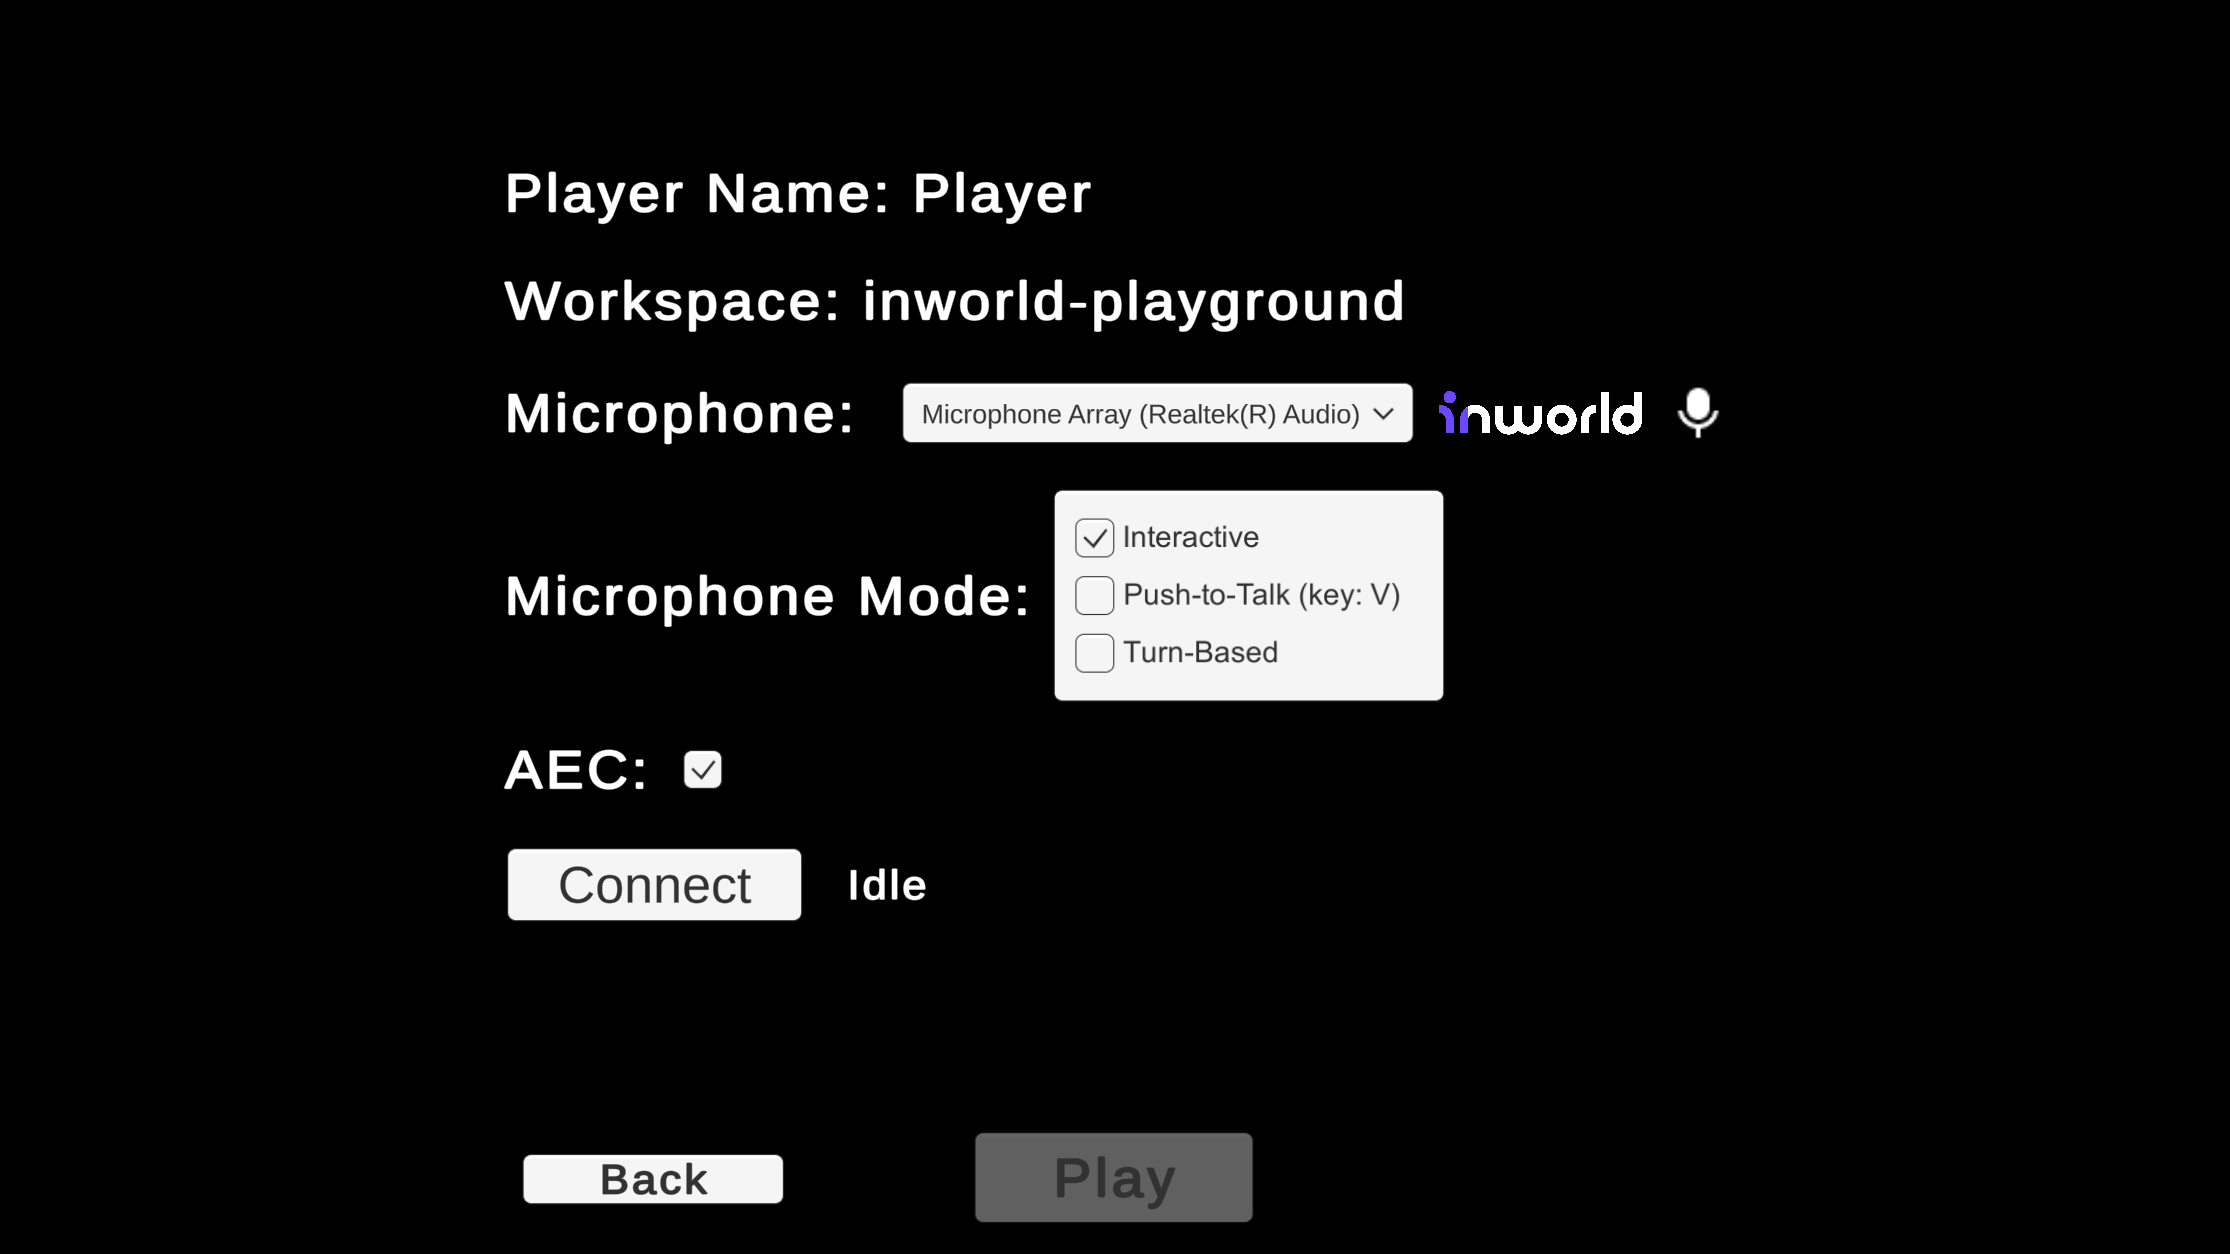
When you finish modifying your settings, click the Connect button to connect with Inworld's servers. Upon successful connection the Play button will become active. Clicking Play will bring you into the Playground Lobby.
For more detailed information about modifying settings see below:
Player Name
The Player Name is the name of the player that was entered during the setup process. Inworld characters will refer to you by this name. You can change this name by restarting the setup process or (if you are in the Setup scene) by pressing the Back button until you return to the Welcome Page.

Workspace ID
The Workspace ID is the ID of the cloned Playground workspace from your account. This was entered in during the setup process. To modify this ID press the Back button until you return to the Workspace ID Page. You can only modify this value from the Setup scene.

Microphone Input Device
The Microphone Input Device section allows you to select which audio input device you would like to use for the Playground demo. The inworld icon will fill purple from the left to visualize the audio input data. This can be used to determine if your microphone is working with the application. The microphone icon on the right side is a mute button which can be used to mute/unmute your microphone for testing purposes (this does not effect the microphone outside the Settings menu).

⚠️ Note: A working microphone is required to play the Playground demo.
Microphone Mode
There are three different microphone/interaction modes to choose from.
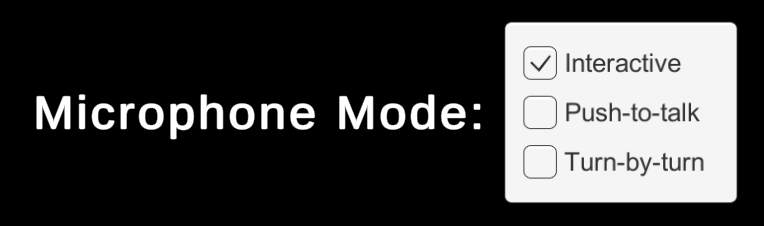
Each will effect how you can interact with the Inworld characters in the Playground in different ways:
- Interactive (default): Microphone is always on, you can speak at any time.
- Push-to-talk: You must press and hold the push-to-talk key (C by default) to speak to a character.
- Turn-by-turn: You can not interrupt characters. If a character is speaking you will be ignored until they finish.
AEC
The AEC toggle allows you to enable/disable acoustic echo cancellation in the Playground demo.

Acoustic echo cancellation helps to reduce audio feedback from speakers affecting the characters in game.
Connection
The Connect button allows you to Connect/Disconnect from the server.


Before playing you must connect to the server, otherwise the Play button will be disabled.